Everything can be done with budget
Compact Laundry Area Makeover on a Budget: 17 Genius Ideas to Transform Your Space
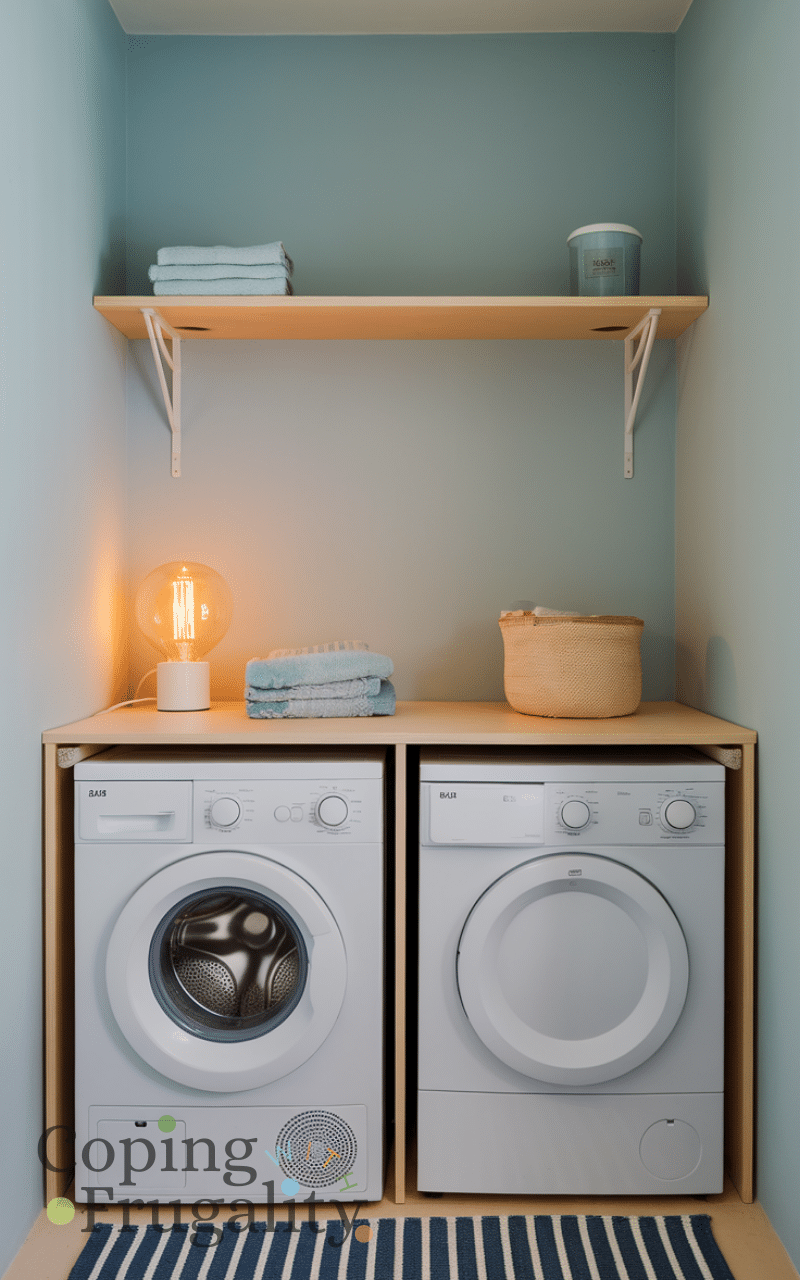
I approached this Laundry Area Makeover with one clear goal in mind: function first, without sacrificing a clean and sterile look. Removing the pink laminate counters instantly modernized the space, and swapping in a single all-in-one unit completely changed how I use the room day to day. This Laundry Area Makeover feels effortless now, especially because I no longer worry about forgotten loads or awkward venting, something that mattered just as much to me as the final look.
What really made this Laundry Area Makeover work was smart storage and thoughtful layout changes. I added laundry basket shelves, lowered the hookups, and kept the last upper cabinet by choosing the right appliance instead of forcing a full tear-out. Painting everything and finishing with black hardware gave the room a crisp, intentional feel, similar to how thoughtful bedroom floor mirror placement can visually expand a space without adding clutter.
I also wanted this laundry area makeover to support real life, not just look good in photos. The built-in closet cabinetry, dedicated outlets, lighting, and space for pet essentials turned the area into something practical and easy to maintain. I love that it stays visually calm even when in use, and so far, it has been a dream when it comes to storage, flow, and everyday function.
Why you need to choose these Laundry Area Makeover on a budget
Transforming your laundry area can completely change how you feel about chores, turning a mundane space into an organized, efficient, and even enjoyable part of your home. A makeover allows you to maximize storage, improve workflow, and create a visually appealing environment, making laundry less of a hassle and more of a satisfying routine.
Some helpful tips to consider
When planning a laundry area makeover, focus on functional storage solutions, such as shelving, cabinets, or baskets, to keep supplies tidy and accessible. Choosing durable surfaces, proper lighting, and space-saving appliances can enhance both style and efficiency, while small decorative touches like plants or wall art add personality and make the space inviting.
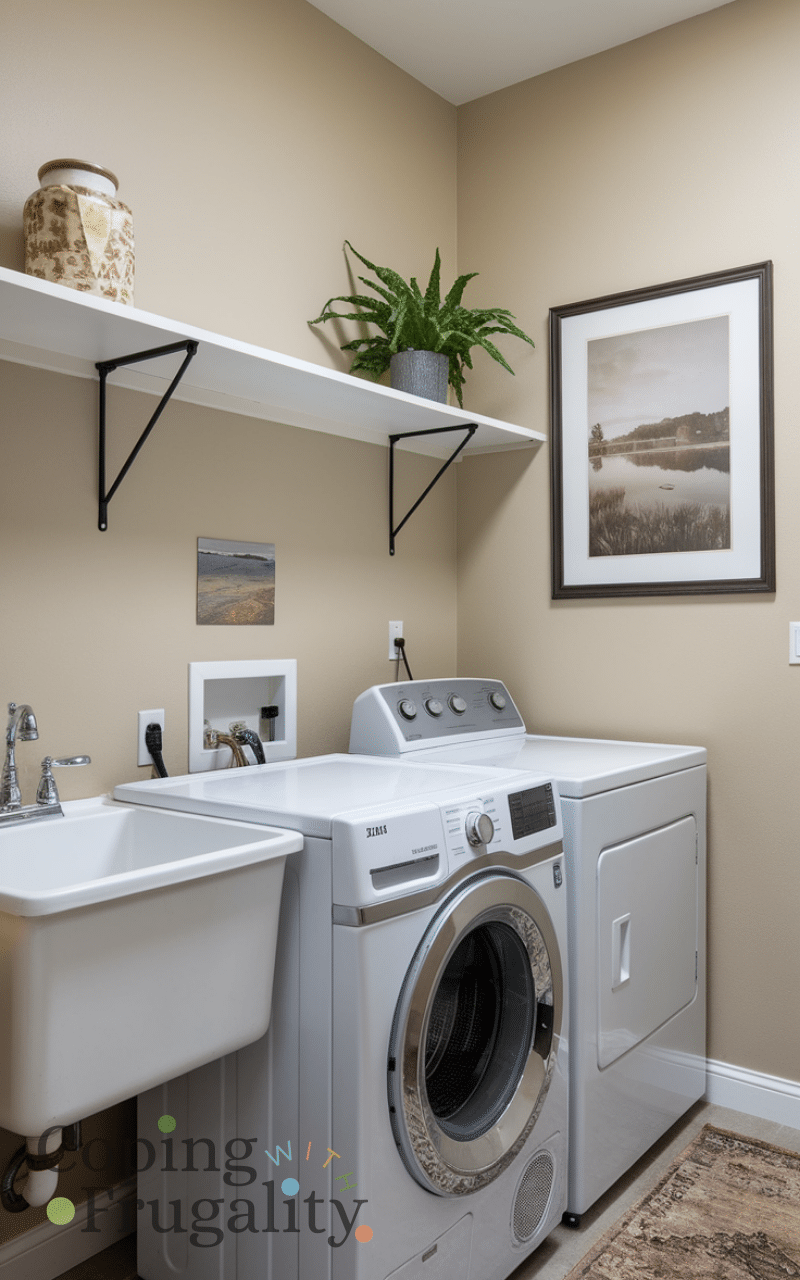
17. Wall-Mounted Shelving
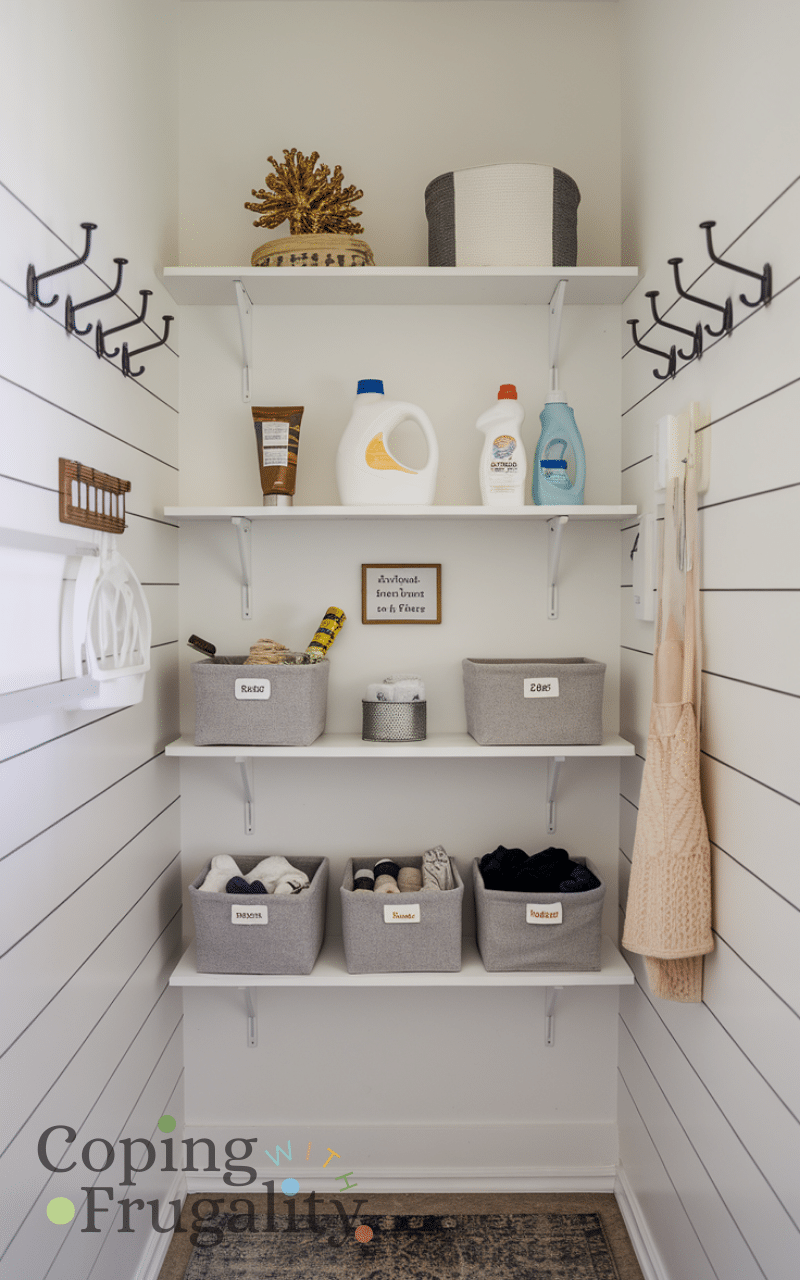
Adding wall-mounted shelving is a simple, budget-friendly way to maximize vertical space in your compact laundry area. Use these shelves to store detergent, fabric softeners, and small baskets for socks or cleaning supplies. This keeps everything within reach while maintaining a tidy look. For a cozy touch, add small decorative items or labels. A compact laundry area makeover on a budget doesn’t require fancy cabinetry—just clever use of walls and open storage to make your space both functional and visually appealing.
When I added wall-mounted shelves, I spent about $40–$120 depending on the bracket style and wood quality, and honestly, it was one of the best low-cost upgrades I’ve made. I skipped custom cabinetry and used simple stained pine boards to keep costs down, which saved me at least $200. My biggest tip is to anchor everything into studs—don’t rely on drywall anchors alone if you’re storing heavy detergent. I personally recommend keeping shelves visually light and not overcrowding them; less really does look cleaner. The biggest mistake I see is people stacking bulky containers up high, which makes the space feel cluttered and slightly unsafe.
16. Rolling Cart Organizer
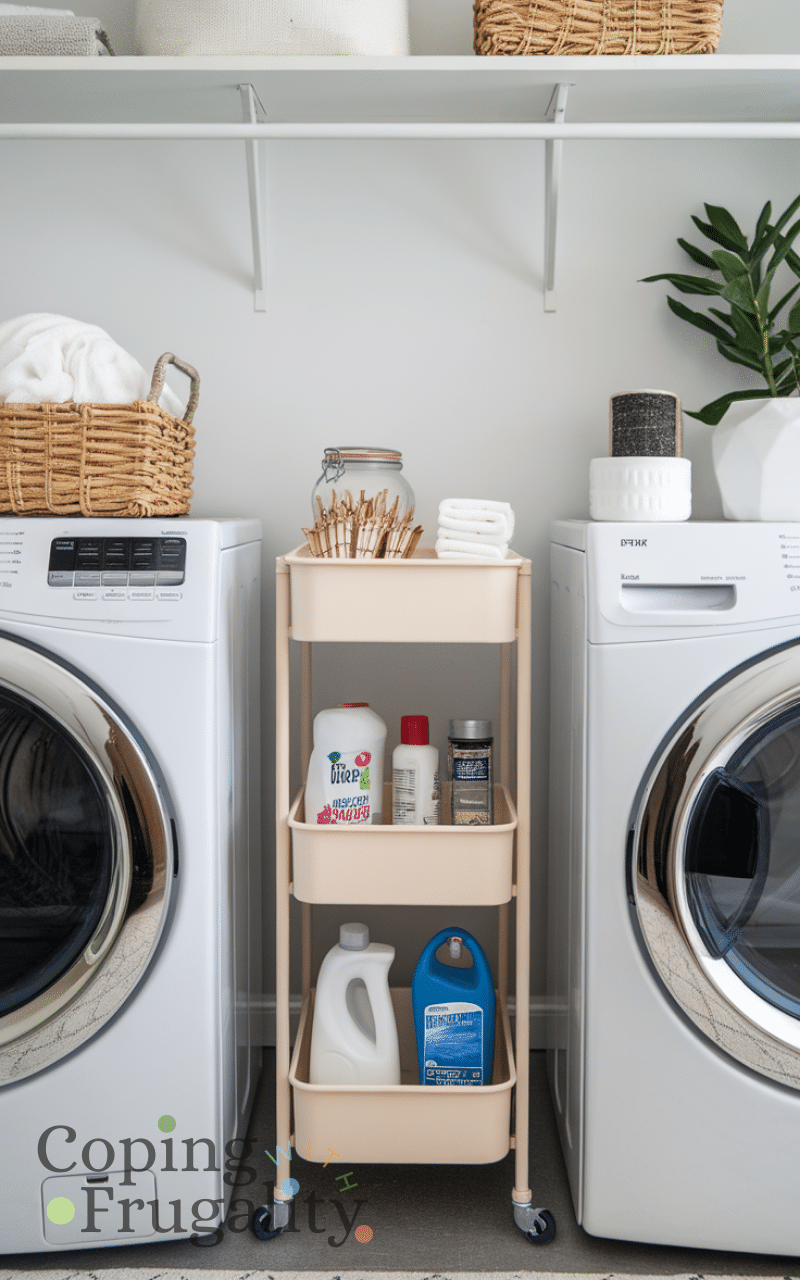
A slim rolling cart can slide between your washer and dryer or sit in a corner, providing extra storage without taking up permanent space. Use it to hold laundry essentials like stain removers, dryer sheets, or spare clothespins. Rolling carts are inexpensive, easy to move, and perfect for a compact laundry area makeover on a budget. With a few decorative baskets or jars on top, your cart can double as a stylish addition, keeping your laundry zone organized and accessible.
My slim rolling cart cost me around $25–$60, and it instantly gave me storage without committing to built-ins. I found mine on sale and swapped out the wheels for better ones later, which was cheaper than buying a higher-end version upfront. If you’re trying to save, check discount stores or even secondhand marketplaces. I strongly recommend measuring the gap between your machines before buying—trust me, guessing leads to returns. A common mistake is overloading the top tier with heavy bottles, which makes the cart wobble and feel flimsy.
15. Over-the-Door Storage
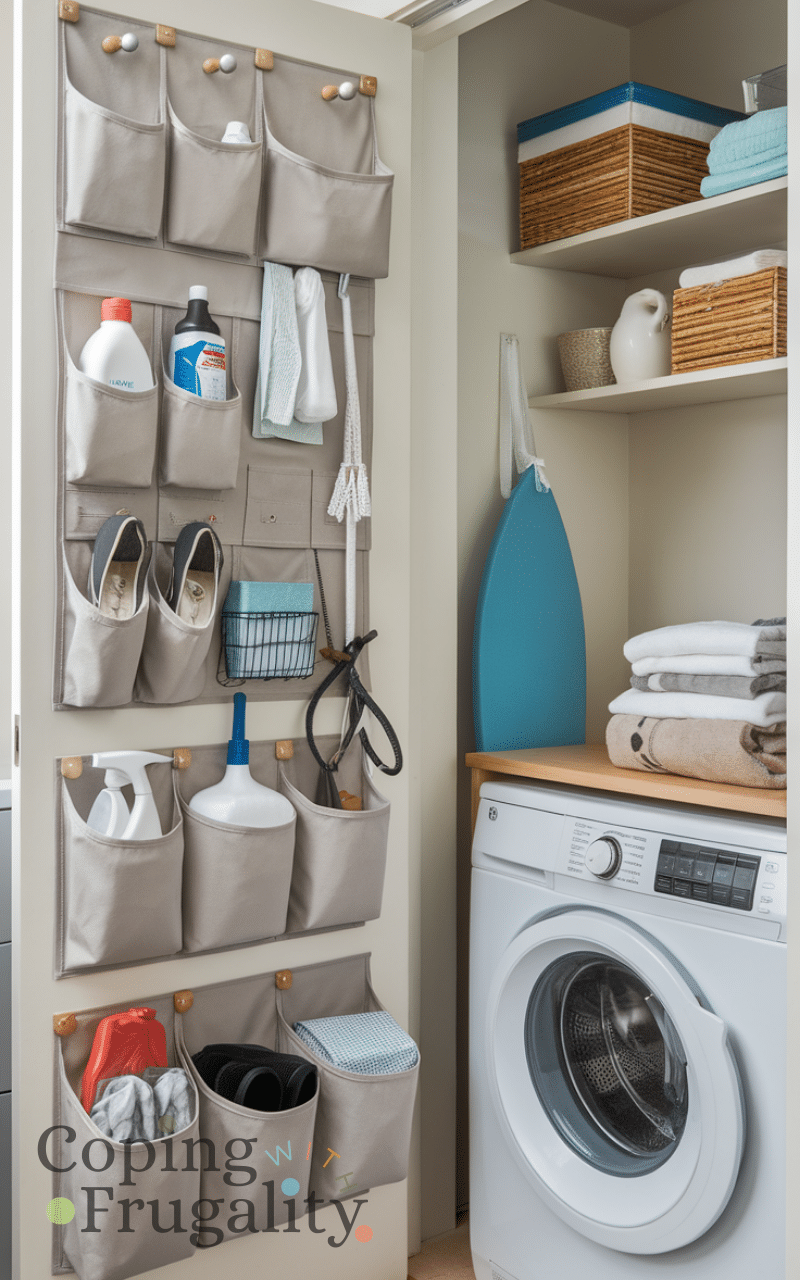
Over-the-door organizers are lifesavers in small laundry areas. They provide pockets or hooks for storing cleaning supplies, ironing tools, or even shoes and small laundry items. Installing one requires no major investment and instantly frees up shelf and counter space. This technique works perfectly for a compact laundry area makeover on a budget, helping you keep items off counters while making sure everything you need is right at hand.
I’ve used over-the-door organizers that cost anywhere from $15–$40, and they’re shockingly effective in tight spaces. I prefer fabric versions with reinforced seams—they last longer and don’t bang against the door. If you’re on a tight budget, reuse a shoe organizer instead of buying something marketed for laundry. I recommend keeping only lightweight items there to avoid strain on the hinges. The mistake I made early on was stuffing it too full, which made the door hard to close and looked chaotic.
14. DIY Folding Station
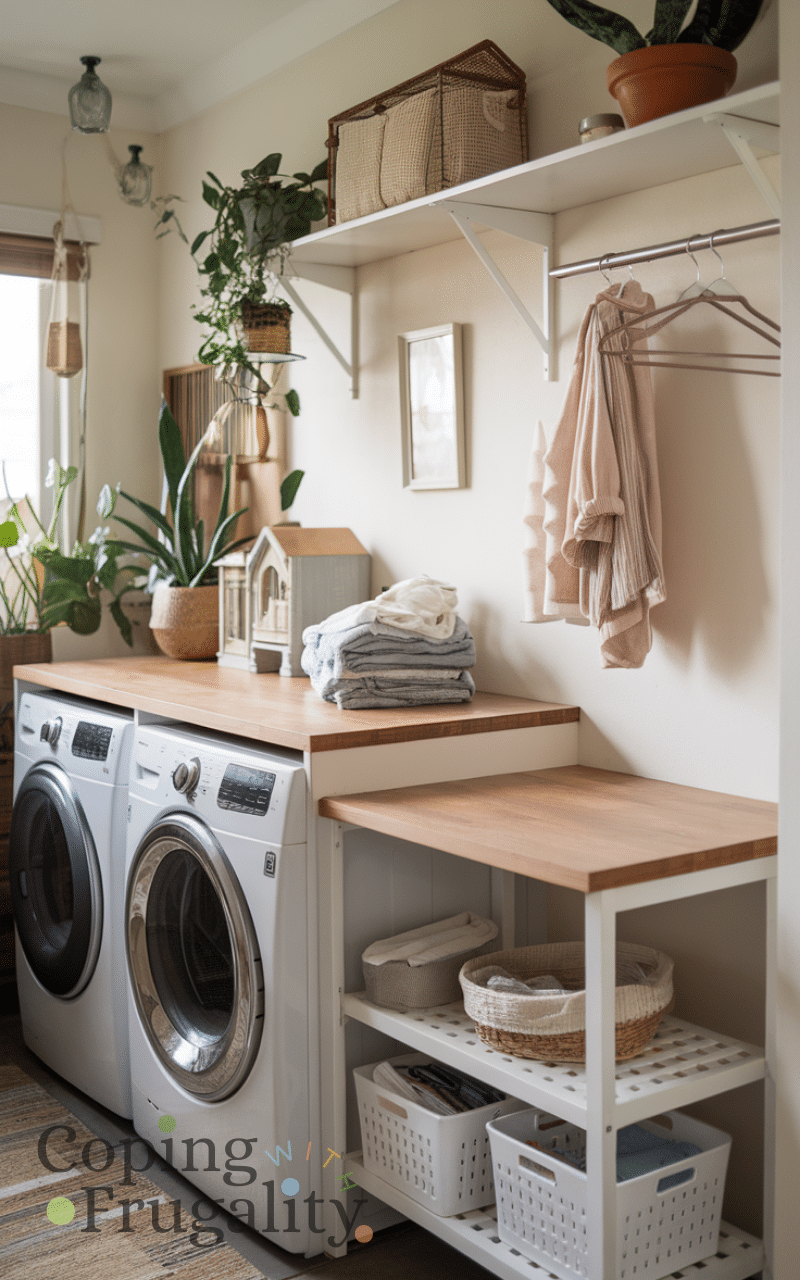
A simple folding station can be created using a countertop over your washer and dryer or a fold-down wall-mounted table. This gives you a dedicated area for folding clothes without taking up extra space. Add hooks or small baskets underneath to store hangers or laundry accessories. Including a folding station in your compact laundry area makeover on a budget enhances functionality and makes laundry feel less like a chore, all while keeping the space stylish and efficient.
My folding station cost roughly $75–$250 depending on materials, and building it myself saved me hundreds compared to custom counters. I chose a simple butcher block remnant instead of a full slab, which kept costs manageable. If you’re looking to save, check local stone yards for leftover pieces—they’re often discounted. I highly recommend prioritizing depth so you actually have room to fold comfortably. One mistake I see often is installing it too high or too low, which makes folding uncomfortable over time.
13. Hooks and Pegboards
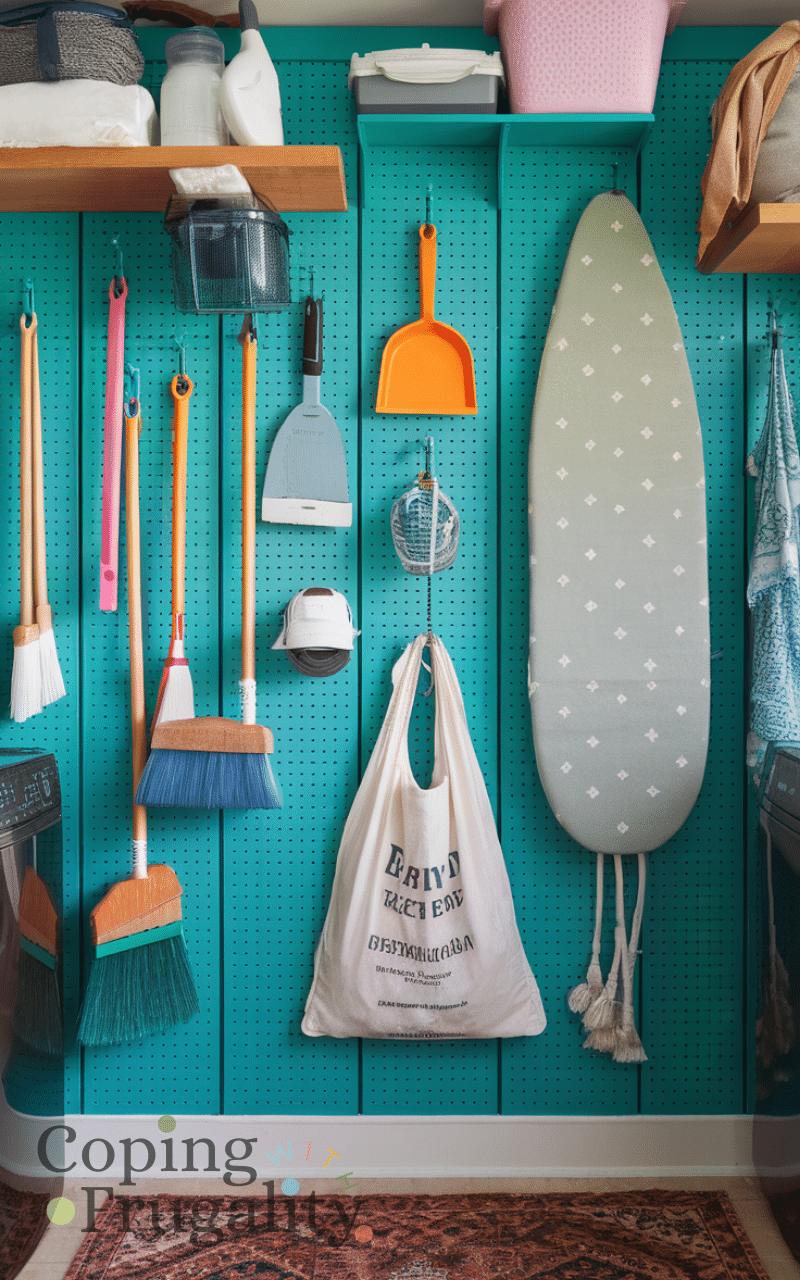
Installing hooks or a pegboard allows you to hang ironing boards, brooms, dustpans, or laundry bags, saving floor space and creating a neat, organized environment. You can paint the pegboard a fun color to add personality without breaking the budget. For a compact laundry area makeover on a budget, this method is practical, versatile, and gives you a visually appealing way to organize your tools while keeping everything easy to reach.
I spent about $30–$100 on a pegboard setup, including hooks and paint, and it was worth every dollar. Buying hooks in bulk online saved me quite a bit compared to individual packs. I always suggest mapping out where everything will hang before drilling—it prevents unnecessary holes. Personally, I think painting the pegboard the same color as the wall looks more polished than going bold. A common mistake is hanging too many small items randomly, which defeats the organized look.
12. Bright, Budget-Friendly Lighting
Good lighting can make a small laundry area feel larger and more inviting. Swap outdated fixtures for bright, energy-efficient LED lights or install inexpensive under-shelf lighting. Adding cheerful, warm-toned bulbs can also make the space feel cozier. A compact laundry area makeover on a budget benefits greatly from proper lighting, as it brightens dark corners, highlights storage, and transforms the area into a more pleasant space to work in.
Lighting upgrades cost me between $40–$150, and the difference was immediate. Swapping outdated bulbs for LED versions cut my energy use and saved money long-term. If you’re budgeting carefully, start with bulbs before replacing full fixtures. I recommend choosing soft white instead of cool white—it feels warmer and less clinical. The biggest mistake I made once was installing lighting that was too dim, which made the space feel smaller than it actually was.
11. Colorful Baskets and Bins
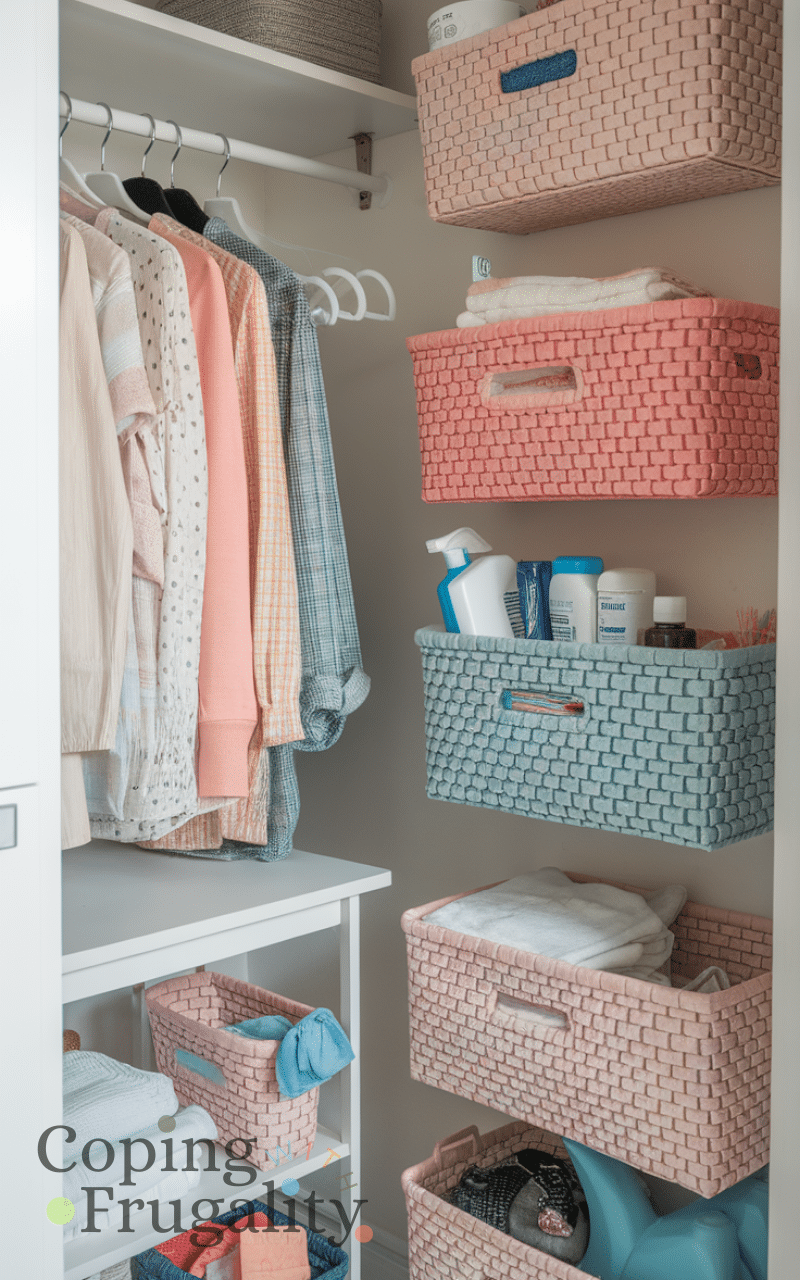
Use matching or colorful baskets to corral laundry supplies, sorting clothes, or holding cleaning products. Grouping items visually reduces clutter and adds a playful pop of color. This strategy is cheap, versatile, and easily updated each season. For a compact laundry area makeover on a budget, baskets and bins keep the space organized and stylish, proving that small touches can have a big impact on functionality and design.
I usually budget $20–$80 for baskets, depending on material, and I try to mix affordable plastic with a few nicer woven pieces. Buying sets instead of singles can save quite a bit. I personally recommend sticking to one color palette so it feels cohesive rather than busy. One money-saving tip: reuse bins from other rooms before buying new ones. A mistake I’ve made is choosing bins that are too small—they look cute but don’t actually hold what you need.
10. Magnetic or Adhesive Storage
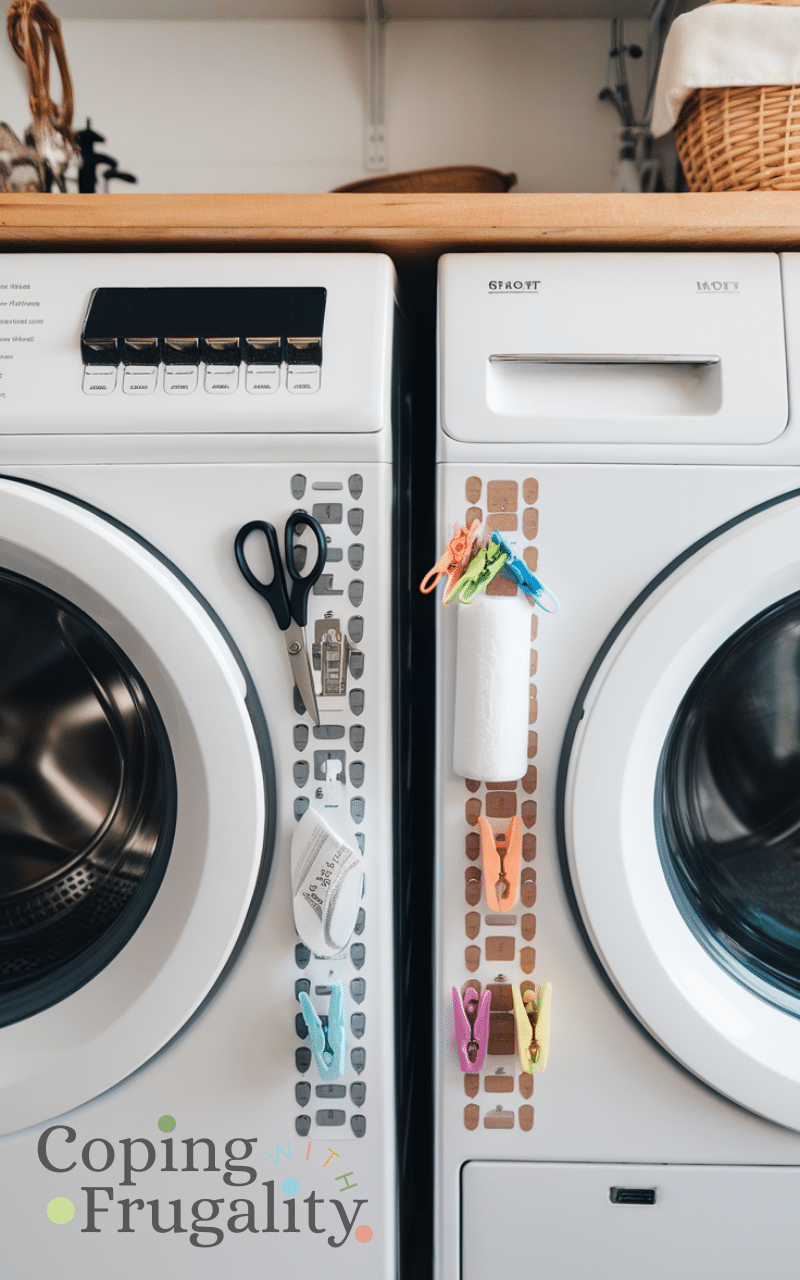
Magnetic strips or adhesive hooks can stick to the sides of your washer and dryer, providing space for small items like scissors, lint rollers, or clothespins. This trick keeps counters free and utilizes otherwise wasted surfaces. Adding magnetic or adhesive storage is a clever way to do a compact laundry area makeover on a budget, making even the tiniest spaces efficient while avoiding expensive built-in solutions.
This was one of my cheapest upgrades at around $10–$35, and it surprised me how functional it was. I tested adhesive strength before committing, which saved me from items falling later. My advice is to clean surfaces thoroughly before sticking anything on. I prefer magnetic options whenever possible—they’re sturdier and removable. The mistake people make is trusting low-quality adhesive hooks with heavier tools, which usually ends badly.
9. Folding Drying Rack
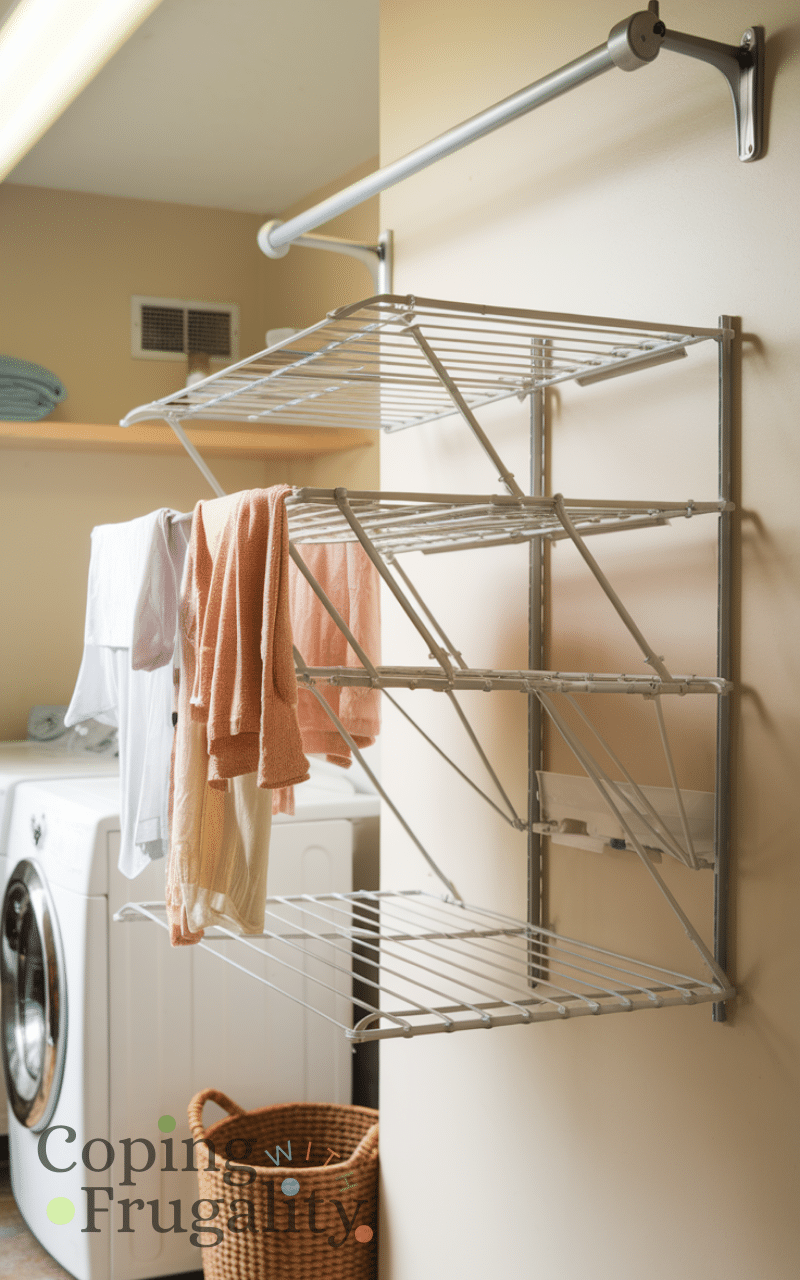
A foldable wall-mounted drying rack allows you to air-dry clothes without taking up floor space. You can fold it down when needed and tuck it away when not in use. This is perfect for apartments or homes with limited laundry space. Including a drying rack in your compact laundry area makeover on a budget maximizes utility while keeping the area uncluttered and functional.
My wall-mounted drying rack cost about $40–$120, and it’s saved me from running the dryer unnecessarily. Air-drying delicate pieces has noticeably extended their lifespan. To save money, look for simple wood designs instead of decorative metal ones. I strongly recommend installing it near ventilation to avoid trapped moisture. A mistake I’ve seen is mounting it too close to cabinets, leaving no room for airflow.
8. Peel-and-Stick Backsplash
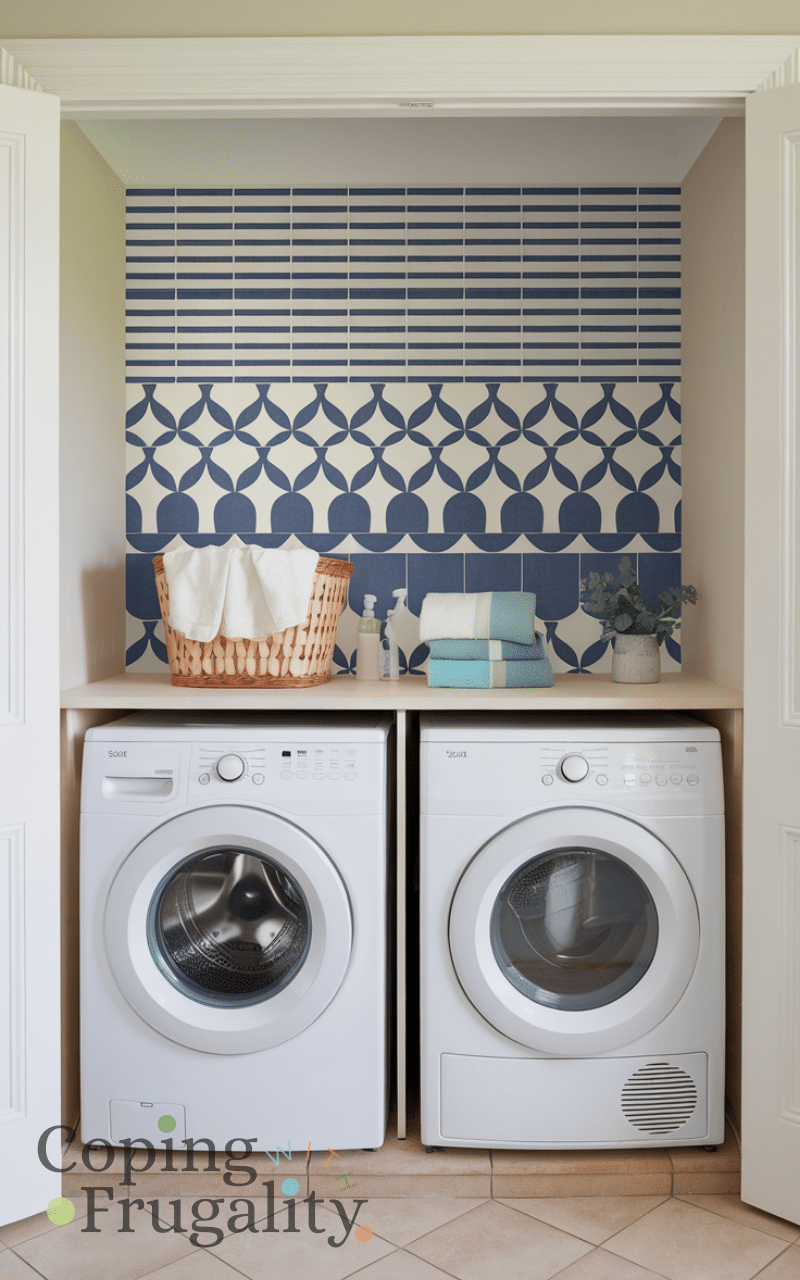
Add personality to your laundry area with a peel-and-stick backsplash behind your washer and dryer. It’s a low-cost way to refresh the space, protect walls, and add a pop of color or pattern. This DIY-friendly solution is perfect for a compact laundry area makeover on a budget, transforming the space from plain to stylish without requiring professional installation or heavy renovation.
I spent roughly $50–$180 on peel-and-stick tiles, and it completely refreshed the wall. Shopping during seasonal sales helped me stay on the lower end of that range. My biggest tip is to order one sample first before committing to a full batch. I personally recommend subtle patterns over bold prints—they age better visually. The mistake I’ve seen most is skipping proper wall cleaning, which causes edges to peel prematurely.
7. Slim Storage Cabinet
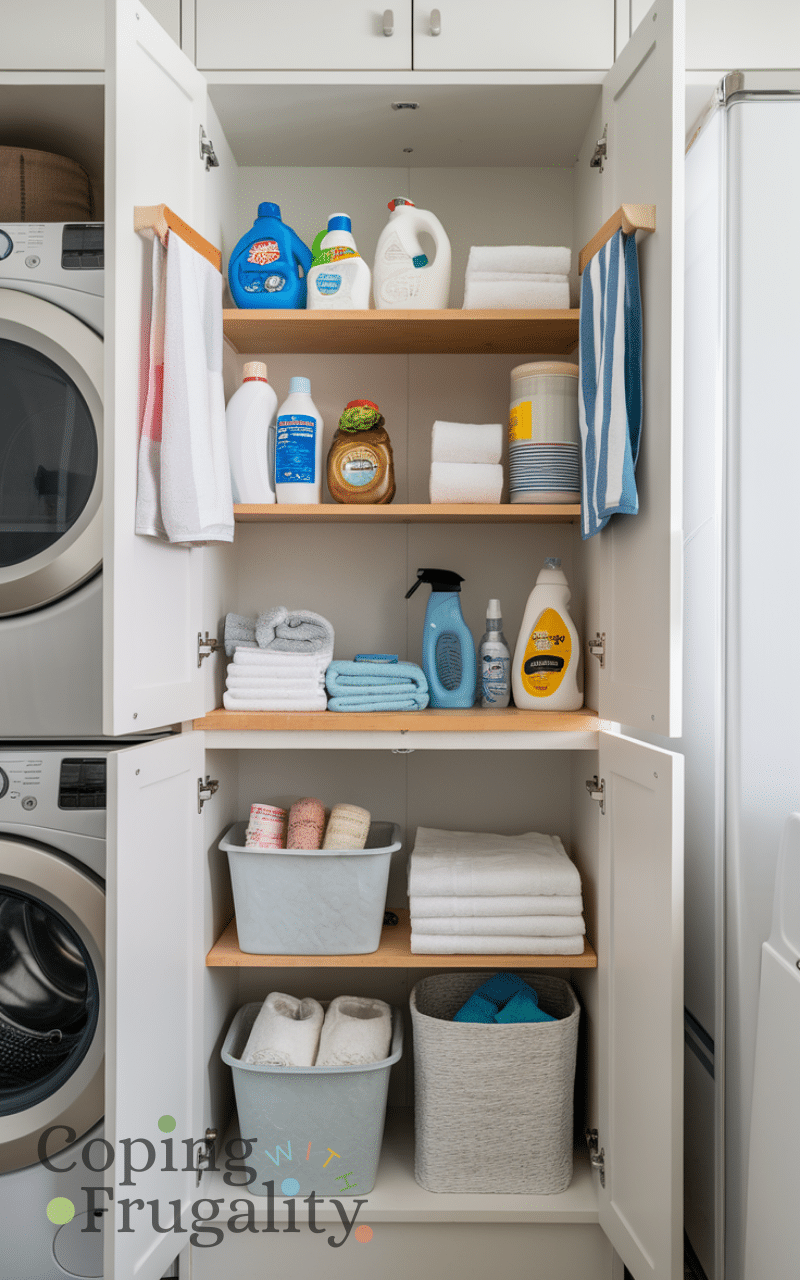
A narrow cabinet can fit into tight corners and provide vertical storage for laundry detergents, cleaning supplies, or towels. Choose one with adjustable shelves to customize space for larger items. Incorporating a slim storage cabinet in your compact laundry area makeover on a budget is an easy way to hide clutter and maintain a clean, streamlined look without spending a fortune.
A slim cabinet usually runs $80–$250, depending on finish, and I chose a basic model that I customized with new hardware. Swapping knobs is such an inexpensive way to elevate the look. If you’re trying to save, assemble it yourself rather than paying for delivery and setup. I recommend adjustable shelving—it makes a huge difference in flexibility. The common mistake is buying one that’s too deep, which crowds already tight spaces.
6. Decorative Labels
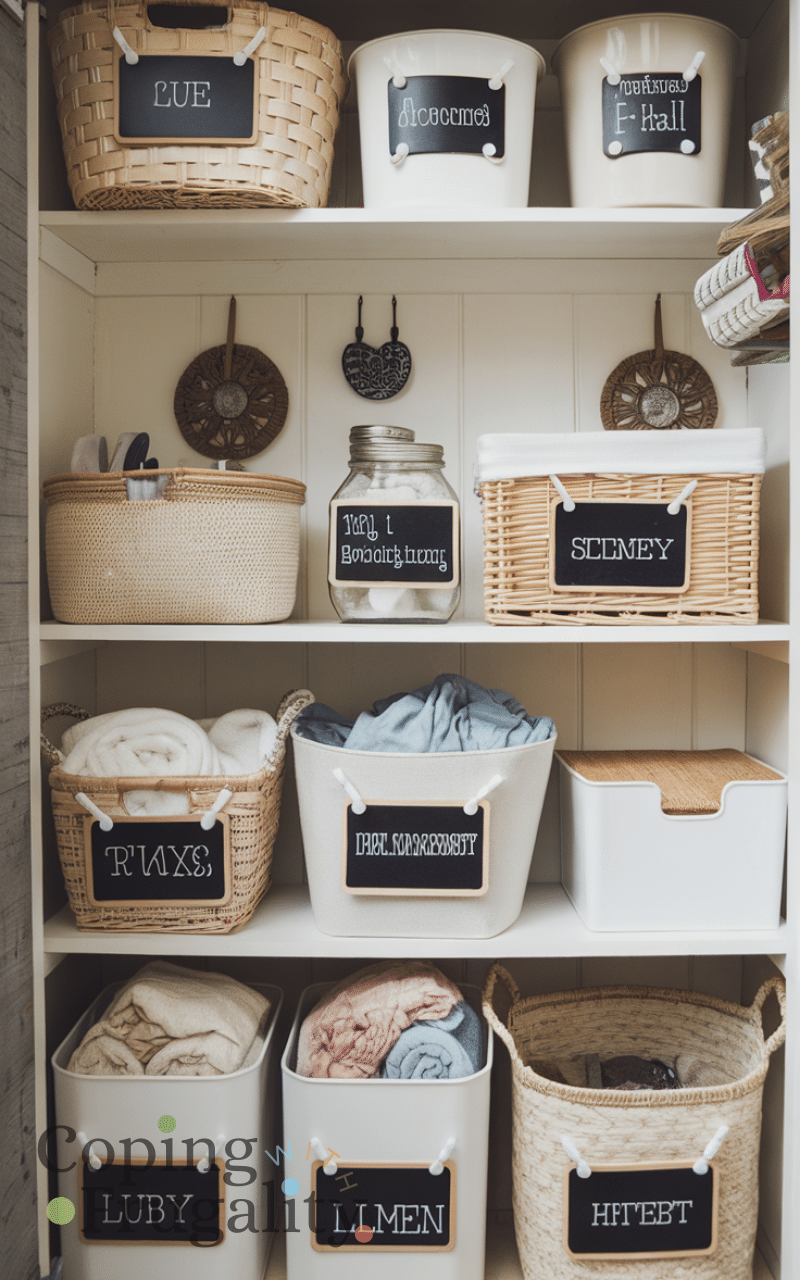
Labeling baskets, jars, and containers makes it easier to find what you need while adding charm to the space. Use fun fonts, colors, or even chalkboard labels to personalize your compact laundry area. Decorative labels are inexpensive and make a compact laundry area makeover on a budget feel intentional and thoughtfully designed while helping you stay organized.
I spent under $20 on labels, and honestly, it made everything feel intentional. Printing my own designs at home saved me from buying expensive pre-made sets. I suggest choosing waterproof options if you’re labeling detergent jars. Personally, I think simple fonts look more elevated than trendy script styles. One mistake is over-labeling everything—it can quickly shift from organized to overwhelming.
5. Small Rug or Mat
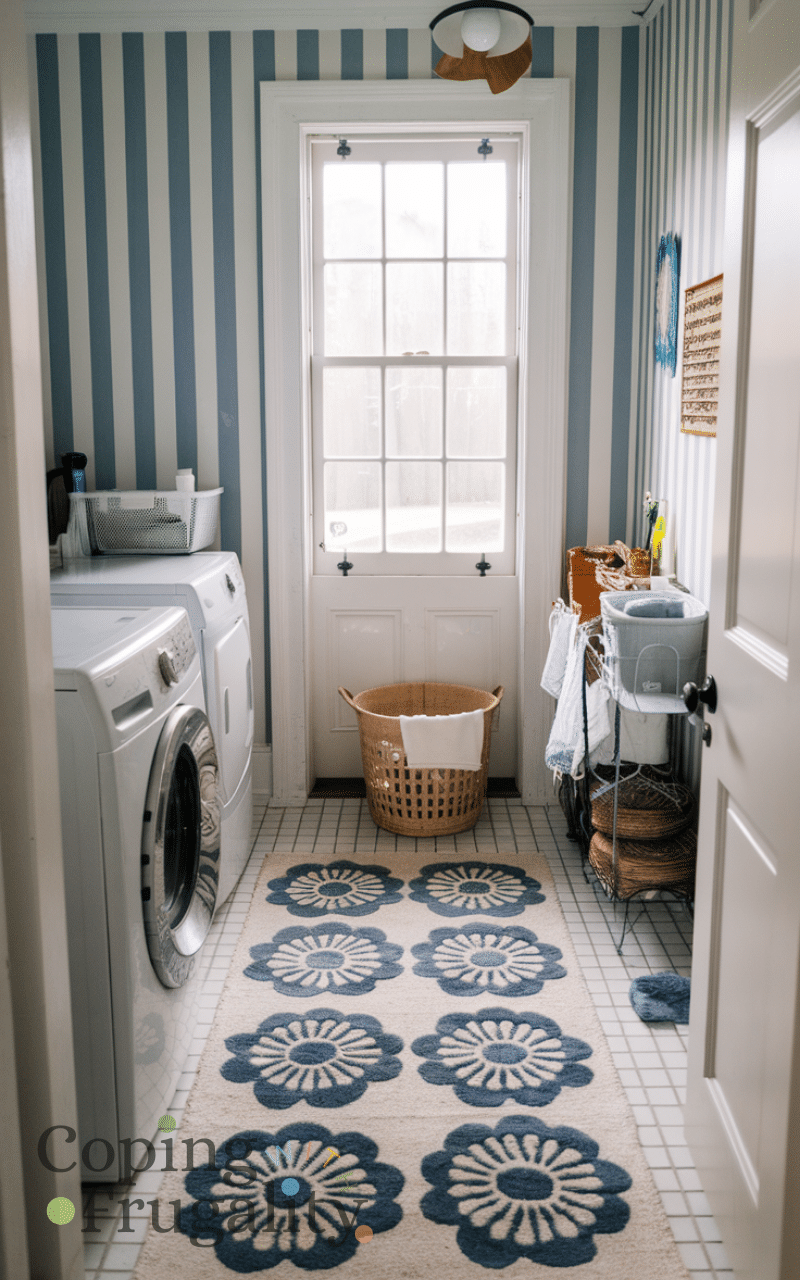
A small, washable rug adds warmth and comfort underfoot while enhancing the decor. Choose a patterned or bright-colored mat to make the space feel cheerful. For a compact laundry area makeover on a budget, rugs are an easy way to add style and comfort without taking up space or requiring major changes.
My washable rug cost around $25–$90, and it added instant warmth. I waited for a sale and chose a machine-washable option, which I highly recommend. If you want to save, check clearance sections instead of specialty home stores. I prefer low-pile rugs because they’re easier to clean and don’t trap lint. A mistake I’ve made before was choosing a light color that showed every speck of dust.
4. Hanging Rod for Clothes
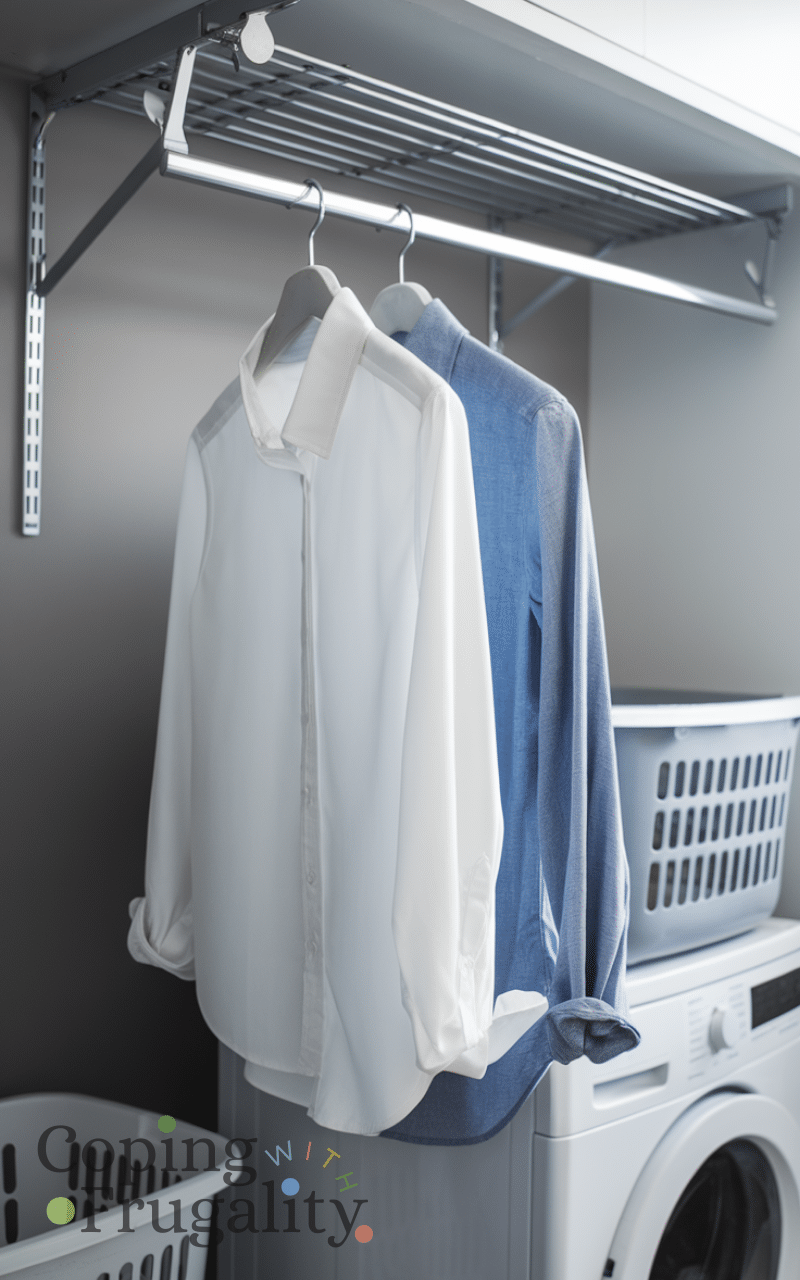
Install a tension rod or wall-mounted rod to hang freshly laundered items straight out of the dryer. This keeps clothes wrinkle-free and provides a functional space for air-drying delicates. Including a hanging rod in your compact laundry area makeover on a budget adds convenience and makes the laundry process smoother without needing extra furniture.
Installing a rod cost me about $15–$70, and it made laundry flow so much smoother. I used a sturdy tension rod first to test placement before committing to drilling. That small step saved me from patching holes later. I recommend installing it where you can grab clothes directly from the dryer without crossing the room. A common mistake is choosing a weak rod that bows under heavier garments.
3. Repurposed Furniture
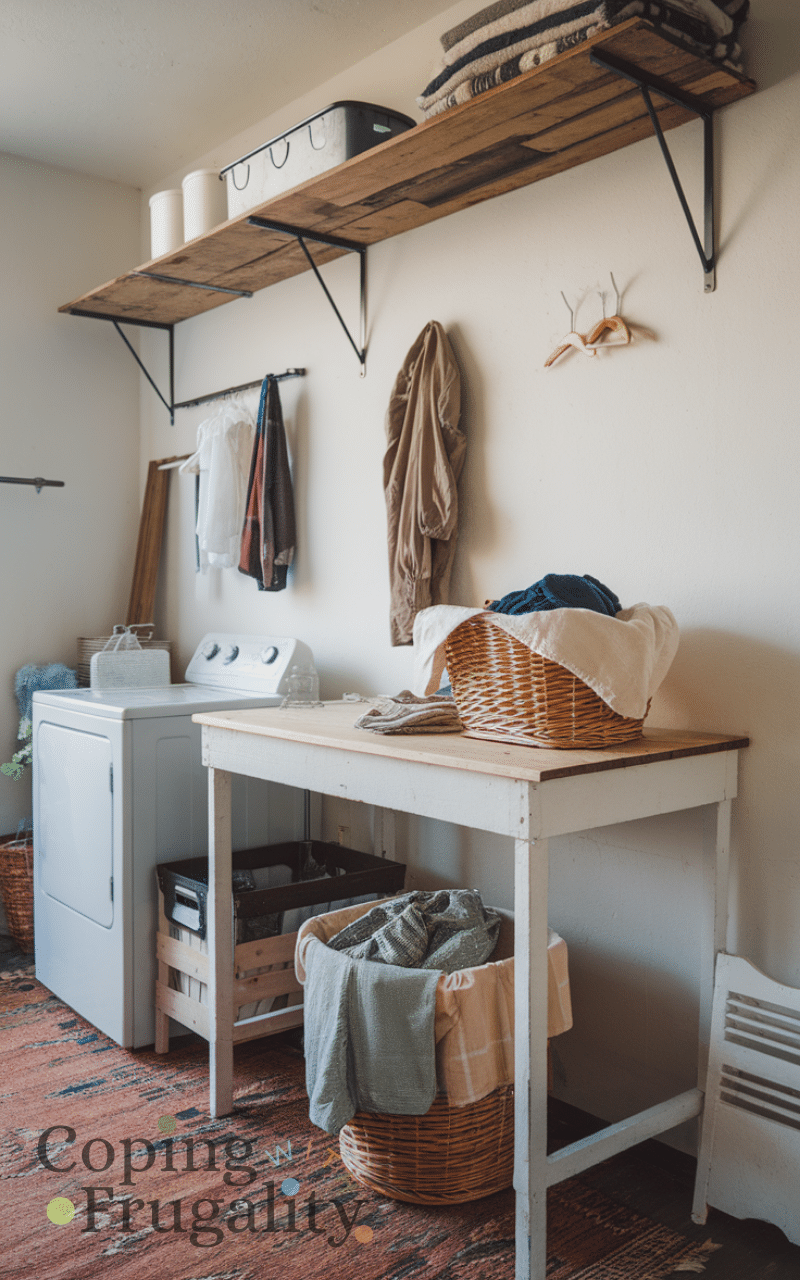
Old tables, stools, or shelving units can be repurposed as laundry storage, folding stations, or shelving. This DIY approach saves money and adds unique character to your space. Repurposing furniture is a smart way to do a compact laundry area makeover on a budget, allowing you to personalize your area without spending on brand-new items.
Repurposing furniture cost me anywhere from $0–$100, depending on what I already had. I once refinished an old table instead of buying new, which saved at least $300. My tip is to shop your own home first before heading to the store. I personally love pieces with character—they make the space feel layered and intentional. The biggest mistake is not sealing surfaces properly, especially around moisture.
2. Green Touches
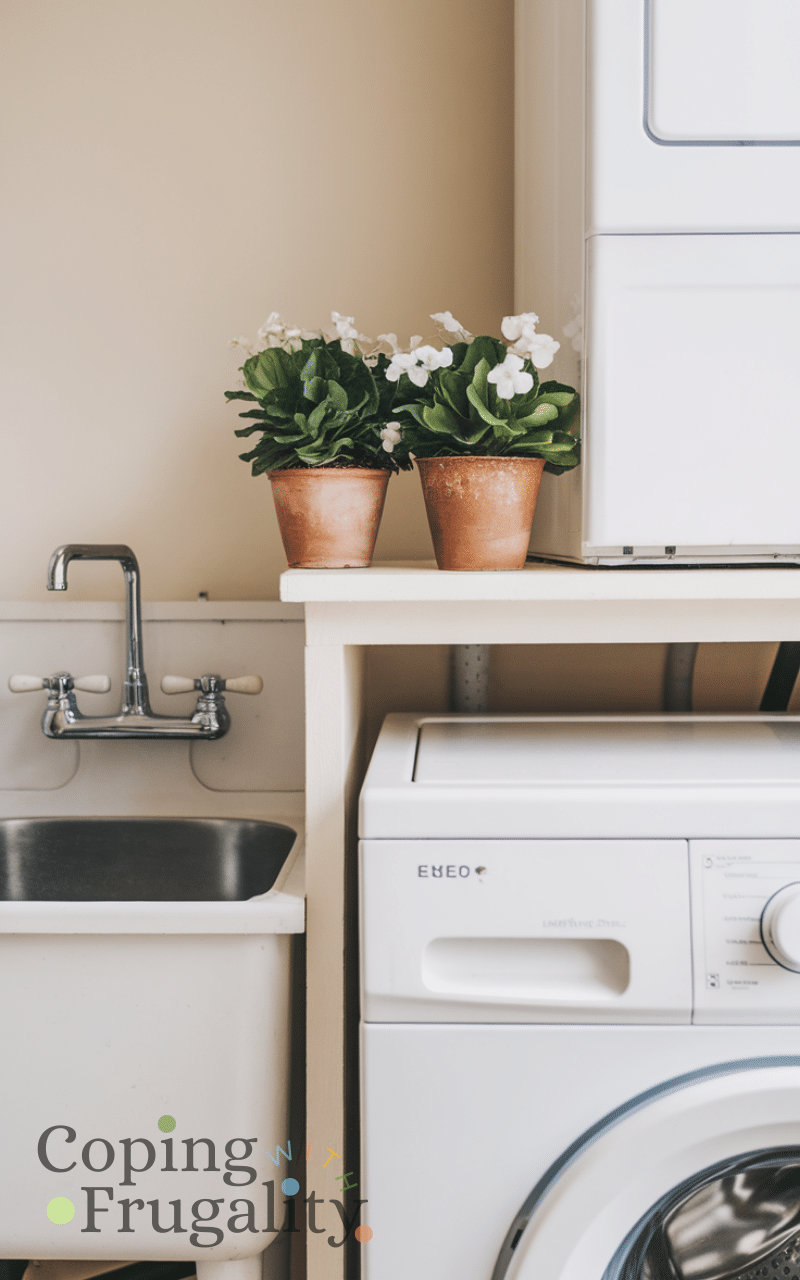
Add small potted plants or faux greenery to bring life and freshness to your laundry area. Plants can improve mood and make the space feel inviting. Including greenery in your compact laundry area makeover on a budget is a subtle, cost-effective way to make the space feel more vibrant and enjoyable.
I usually spend $10–$50 on plants, but you can easily propagate from cuttings for free. I’ve found that hardy, low-light plants work best in laundry areas. If you’re worried about maintenance, faux greenery has improved a lot and can look realistic on a budget. I recommend keeping it minimal—one or two plants is enough. The mistake I’ve made before is choosing high-maintenance plants that didn’t tolerate humidity well.
1. Personal Decor Touches
Finally, add personal touches like framed prints, decorative jars, or small art pieces. These make the laundry area feel like a designed part of your home rather than a purely functional space. Adding personal decor finishes your compact laundry area makeover on a budget, ensuring the space is not only practical but also cozy and visually appealing.
I typically budget $20–$100 for small decor pieces, often collecting them gradually instead of buying everything at once. Framing printable art is one of my favorite money-saving tricks—it looks custom without the cost. I recommend choosing pieces that actually mean something to you rather than filling space just to decorate. In my experience, too many small items can quickly create visual clutter. The key is editing carefully so the space feels styled but still calm and functional.
Conclusion
Transforming your laundry area doesn’t have to break the bank. These 17 ideas for a compact laundry area makeover on a budget show that clever storage, DIY touches, and small decorative updates can make a huge difference. Start applying these tips today and enjoy a more organized, stylish, and functional laundry space. Don’t forget to subscribe to my blog for more budget-friendly home makeover ideas!

[…] gaps that were previously wasted space. The room feels balanced now, similar to how my earlier Laundry Area Makeover focused on making function feel natural rather than forced. I actually enjoy being in here, which […]