Everything can be done with budget
Easy Layered Lighting Ideas for Homes on a Budget
I switched to Layered Lighting almost by accident, and now I honestly cannot imagine going back. I used to rely on overhead lights and wondered why my space felt cold and flat, even with nice furniture. Once I started turning those big lights off and letting my lamps do the work, everything changed. The room feels calmer, warmer, and more lived in, even if photos sometimes make it look cooler than it really is.
What surprised me most about Layered Lighting is how much control it gives me over mood. I can clean, focus, or relax just by changing which lamps are on and what temperature the bulbs are. I learned through trial and error that warm bulbs make a space feel inviting, while harsh white light belongs only when I actually need to see every detail. This is where Lighting Tricks finally clicked for me, lighting is not about brightness, it is about intention.
Now, when I walk into my home at night, Layered Lighting makes it feel like a place I want to stay in. Lamps work together instead of fighting each other, and nothing feels like an operating room anymore. I love that I can shift the vibe without changing a single piece of decor. It is such a simple change, but it completely transformed how my space feels and how I feel inside it.
Why You Need to Choose these Layered Lighting Ideas
Layered lighting is a smart way to create a balanced and inviting atmosphere in any room. By combining ambient, task, and accent lighting, you can highlight architectural features, set the mood, and ensure functionality without relying on a single harsh light source. This approach makes your space feel more dynamic and comfortable, whether you’re reading, entertaining, or relaxing.
Some Helpful Tips to Consider
When planning layered lighting, start by evaluating the purpose of each area in your room. Use ambient lighting for overall illumination, task lighting where activities like cooking or working occur, and accent lighting to draw attention to art, décor, or architectural details. Mixing different types of fixtures, dimmers, and bulb temperatures can enhance the depth and warmth of your space, giving it a professional, well-thought-out feel.
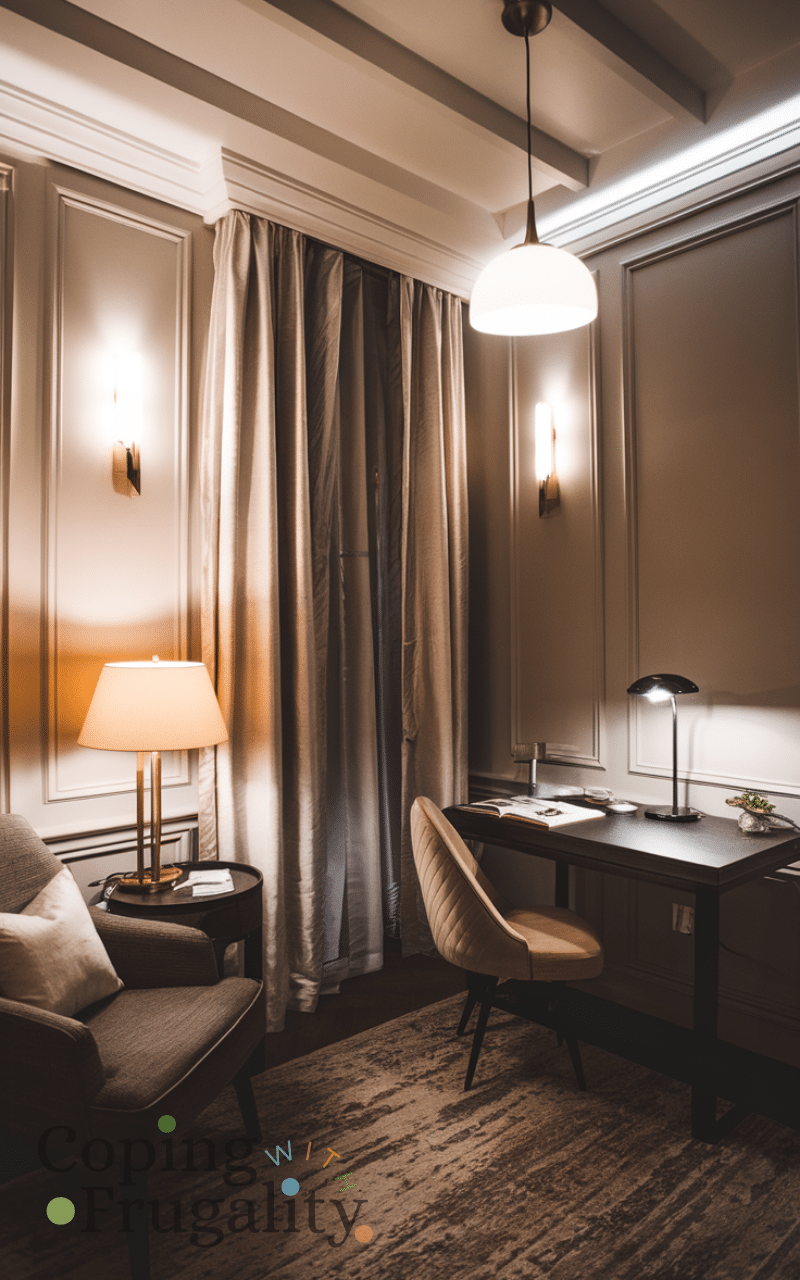
17. Combine Ceiling Lights and Wall Sconces
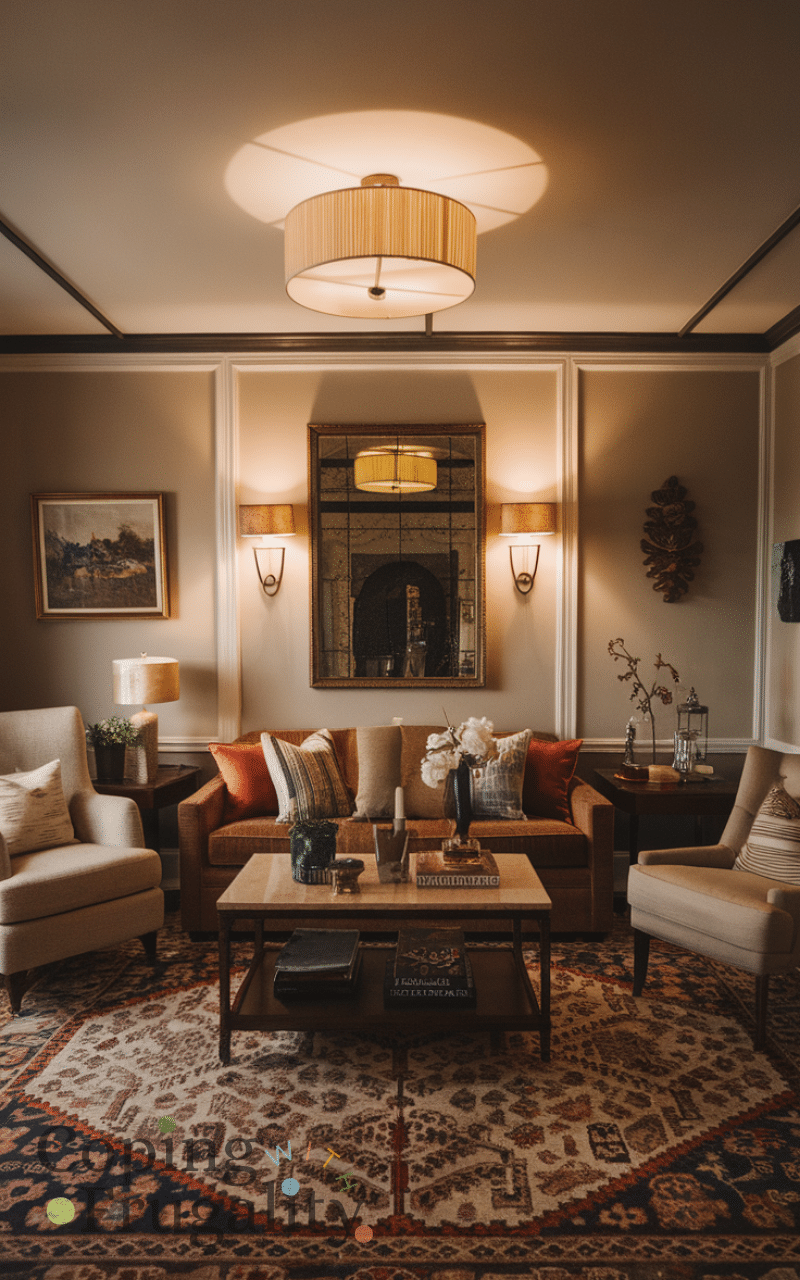
Layered lighting starts with a strong base. Using ceiling lights for general illumination and wall sconces for accent lighting can make a room feel brighter and more dynamic. This approach is perfect for making a home cozy and stylish without spending a fortune. Affordable sconces or DIY-mounted lights can elevate your décor while giving your rooms a well-balanced, layered look that enhances both function and ambiance.
I used to ignore wall sconces because I thought ceiling lights were enough. Once I added a few, I spent around $40–$120 on a couple of affordable fixtures, and the room suddenly felt layered and purposeful. My money-saving tip? Check thrift stores or online marketplaces — you can often find gently used sconces that look expensive. I recommend positioning them to highlight architectural features or seating areas for maximum effect. A mistake people make is installing sconces randomly instead of thinking about how light travels across the space.
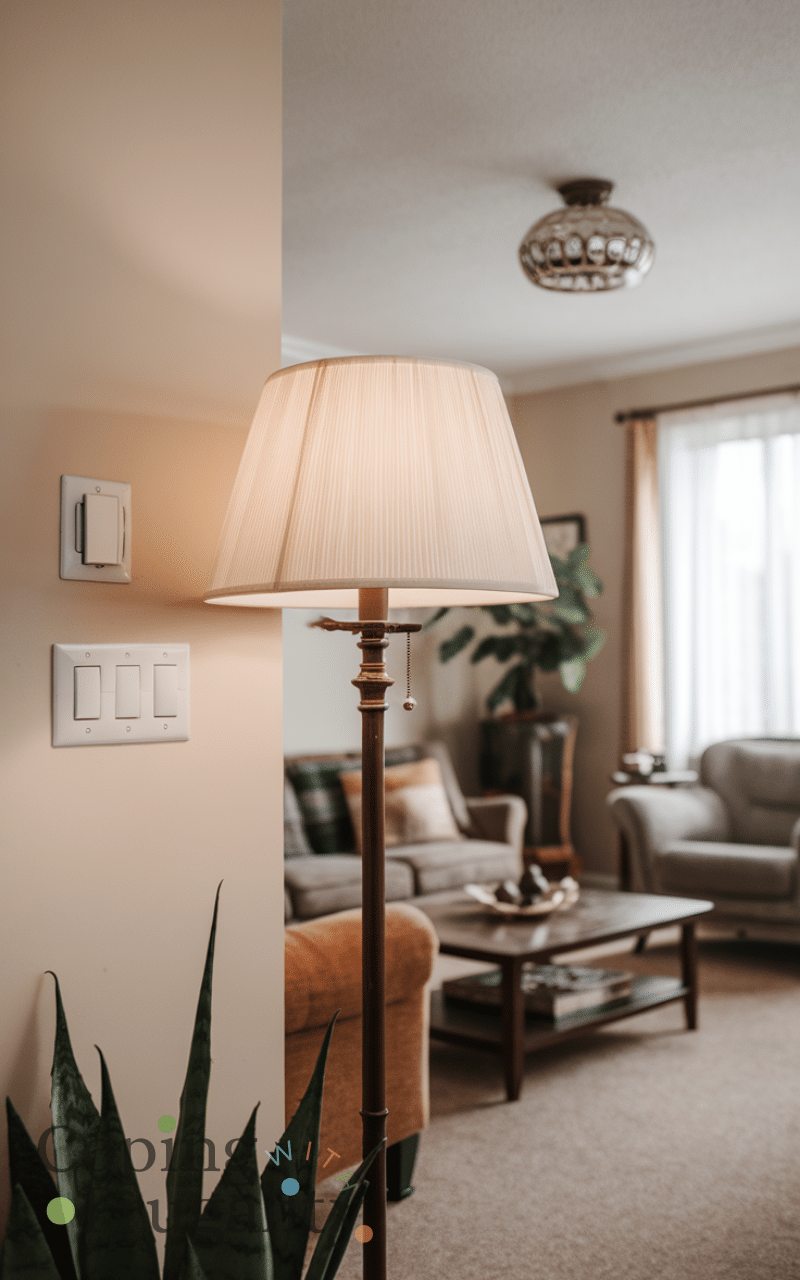
16. Use Floor Lamps in Corners
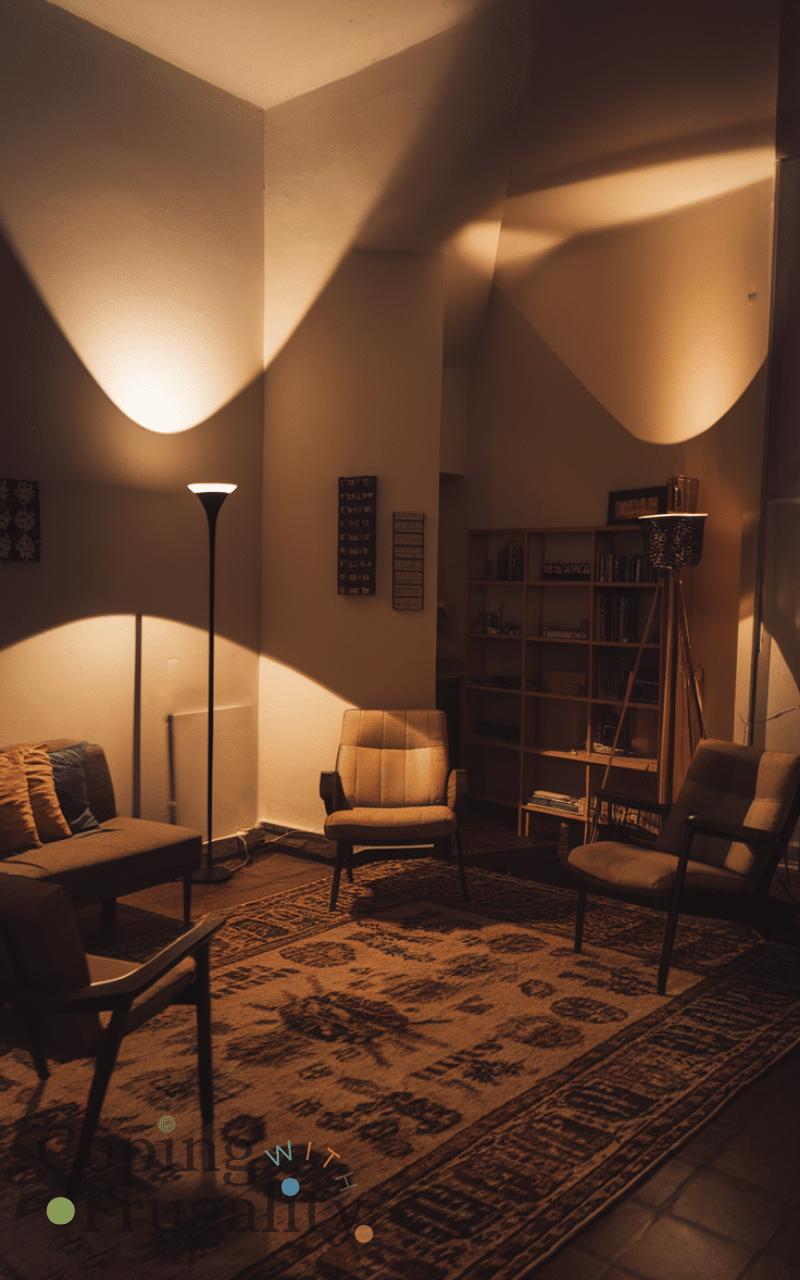
Floor lamps are a budget-friendly way to add depth to a room. Placing them in dark corners creates warm pools of light that complement overhead lighting. Choose slim or adjustable designs to fit your space and style. Floor lamps help spread light evenly, reduce harsh shadows, and instantly improve the mood of your home, making layered lighting accessible even on a tight budget.
Corners used to feel dark and uninviting in my home, but adding floor lamps changed that completely. I’ve picked up lamps for $25–$90, mostly secondhand, and even one sturdy thrifted lamp makes a huge difference. I always test placement first and move lamps around until the glow feels right. My advice? Don’t pick a lamp that’s too short — it won’t fill the vertical space properly. Many people make the mistake of clustering lamps in the center instead of corners, leaving edges gloomy.
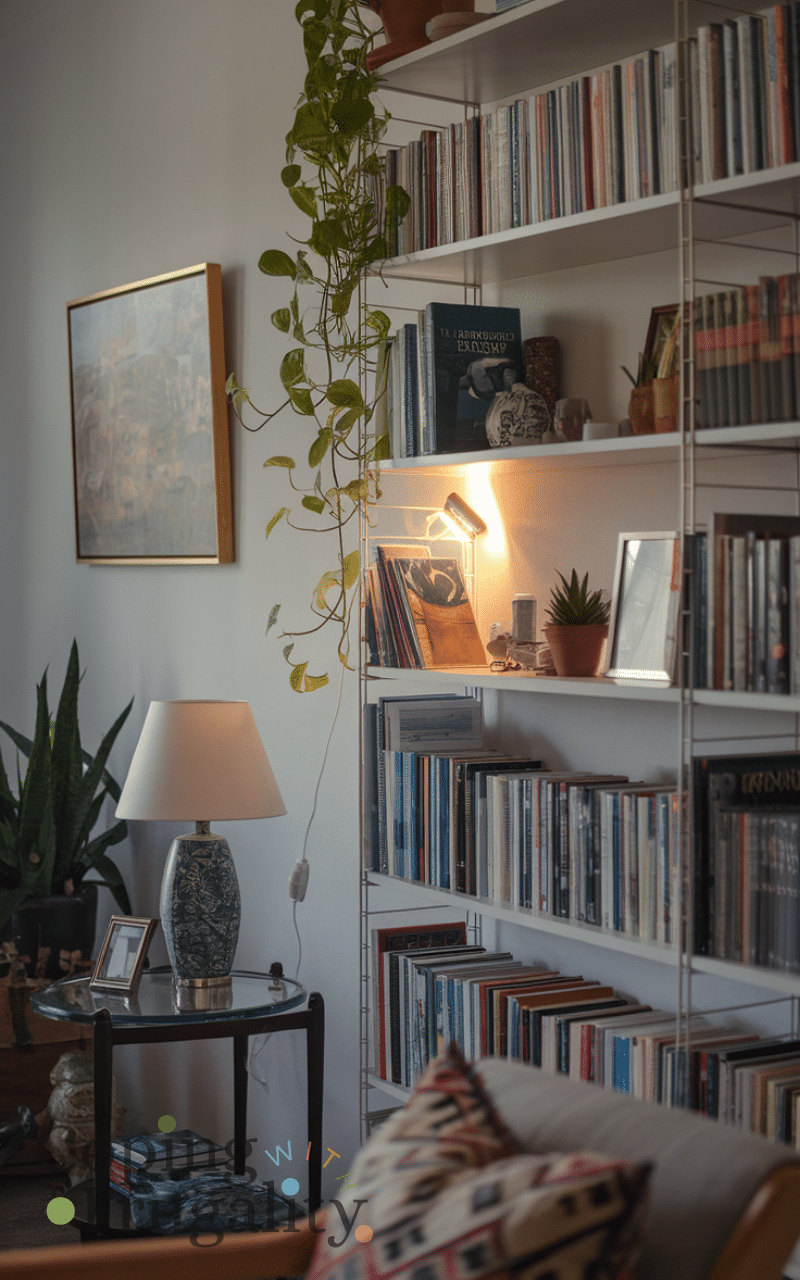
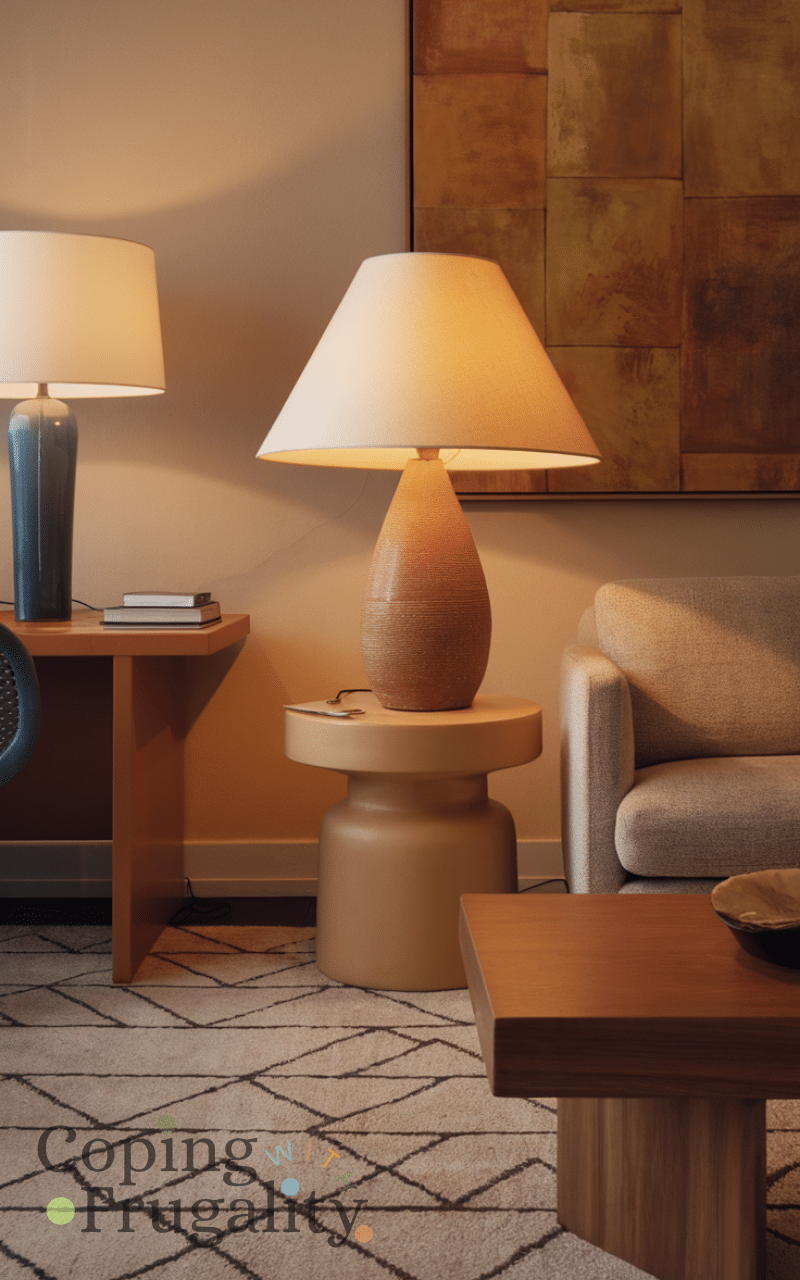
15. Table Lamps for Task and Accent Lighting
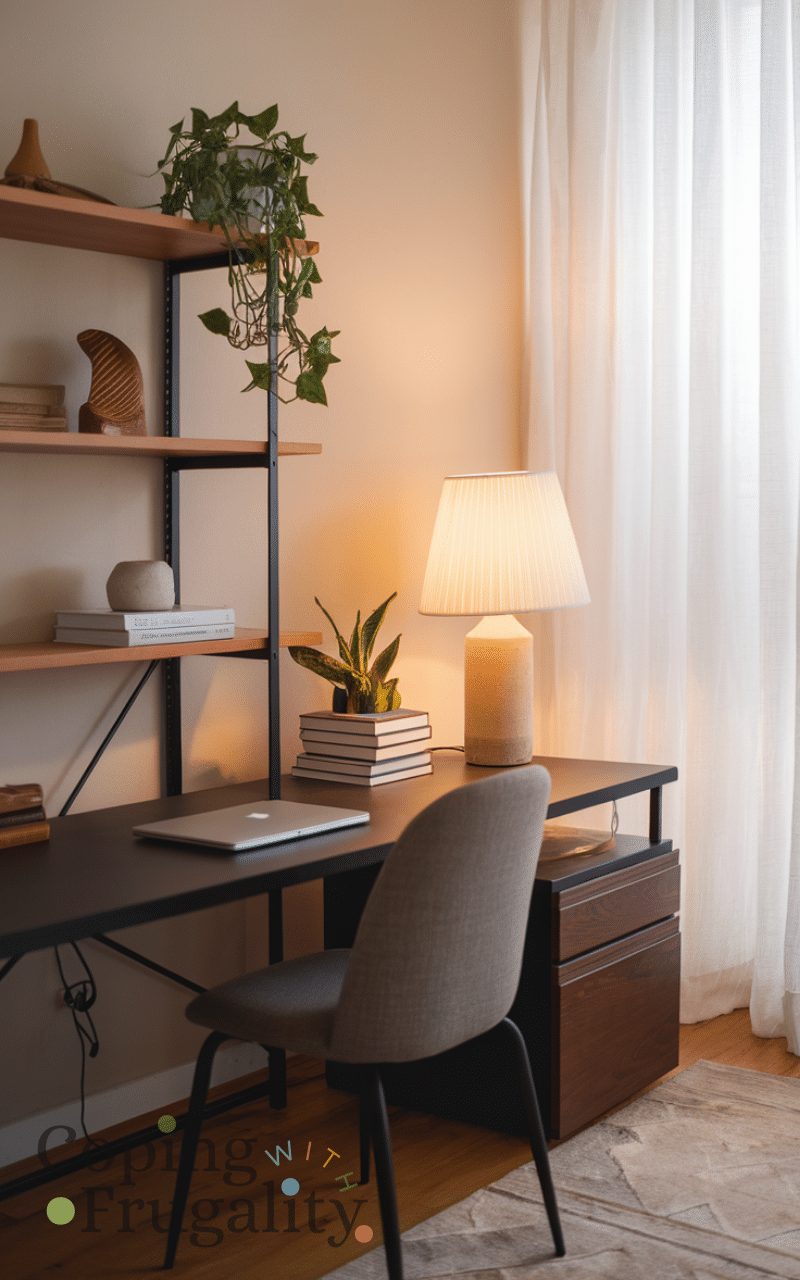
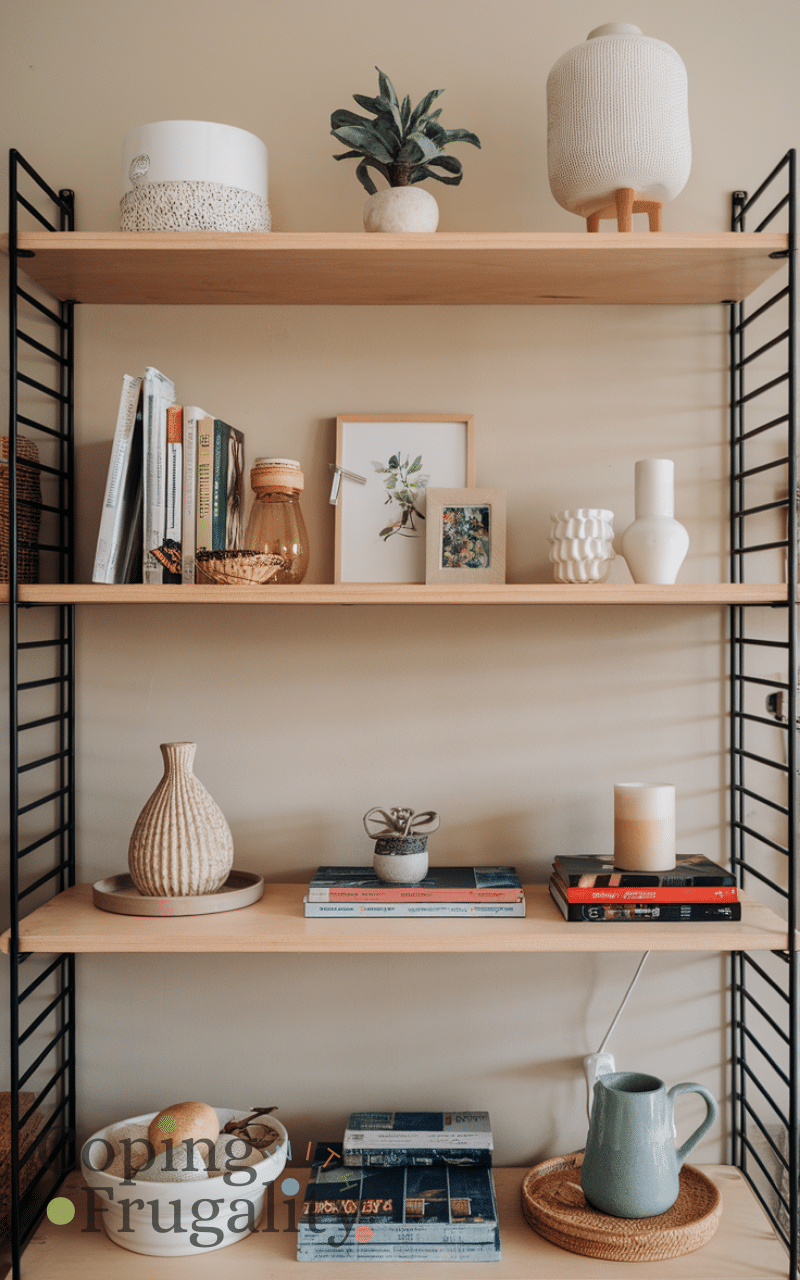
Table lamps are versatile pieces for adding both function and style. Use them on desks, bedside tables, or shelves to create pockets of light for reading or relaxing. Affordable options like thrifted lamps or DIY lampshades make it easy to enhance your layered lighting setup. These lamps help balance your room’s illumination, making your home feel warmer and more inviting on a budget.
Table lamps are my secret weapon for layered lighting. For $15–$60, I can brighten reading nooks or add cozy pockets to my living room. Thrifted lamps or DIY shade updates save money and let me customize style. I personally recommend pairing them with overhead lights for balance rather than letting them compete. A common mistake is buying matching lamps for symmetry; it often makes the setup look flat instead of lived-in.
14. Add LED Strip Lights
LED strips are inexpensive and versatile, perfect for adding accent lighting under cabinets, behind TVs, or along shelves. They create subtle layers that enhance your home’s atmosphere without taking up space. Easy to install and energy-efficient, LED strips are one of the smartest ways to achieve layered lighting on a budget, giving your rooms a modern, cozy feel instantly.
I can’t believe how much mood a few LED strips added for just $20–$80. Under cabinets or behind TVs, they give a subtle, modern glow that makes my home feel more curated. To save, I buy flexible plug-in strips and cut them to size rather than buying pre-measured ones. My recommendation is to choose warm white rather than cold tones — it feels softer and more natural. People often make the mistake of using bright, unfiltered strips that are harsh and glaring.
13. Use Dimmer Switches
Dimmer switches allow you to control the brightness of your lights, adding flexibility to layered lighting. Adjusting intensity can create mood lighting or bright functional spaces as needed. Installing dimmers is often affordable and compatible with many lamps or overhead fixtures. This small change can make layered lighting feel luxurious, helping you transform your home on a budget without buying extra lamps.
Dimmer switches were a game-changer for me. For around $25–$60, I can control brightness across rooms and instantly set the mood. Installing them is surprisingly easy, and I love how they make even inexpensive lamps feel more upscale. My tip? Start with a single room to see the effect before committing to the whole house. A mistake I see often is over-dimming — too dark and it just looks like the lights are broken instead of cozy.
12. Incorporate Pendant Lights
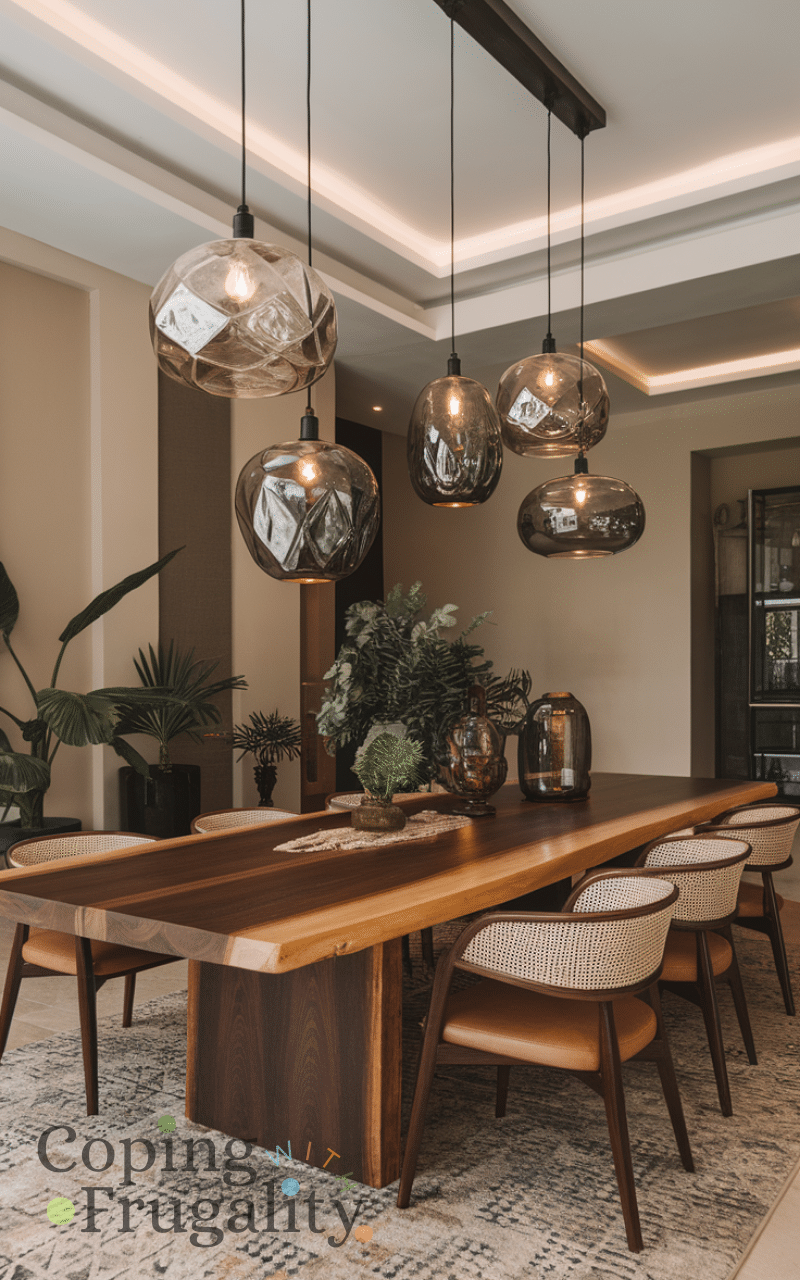
Pendant lights are stylish and functional additions for layering light. Hang them over dining tables, kitchen islands, or reading nooks to create focused illumination. You don’t need expensive designer pieces; budget-friendly pendants or DIY fixtures can achieve the same effect. Combining them with ceiling and accent lighting completes your layered setup, making your home feel more welcoming and well-lit.
Pendant lights feel chic without the price tag if you shop smart. I’ve spent $40–$100 on DIY or budget-friendly pendants that instantly elevate a kitchen island or reading nook. I strongly recommend choosing pieces with simple lines so they complement existing décor. Many people err by hanging pendants too low, which cuts off sightlines and looks awkward.
11. Highlight Artwork or Decor
Spotlighting artwork, photos, or decorative pieces adds visual interest and creates layers of light. Use small, affordable clip-on lights or mini LED spotlights to draw attention to your favorite items. This technique not only highlights décor but also makes your rooms feel richer and more thoughtfully lit, achieving layered lighting without costly renovations.
I love using small spotlights to highlight my favorite pieces. Affordable LED spotlights cost about $10–$40, and they make the room feel intentionally layered. I usually check thrift stores for clip-on options to save money. My recommendation? Focus on one or two pieces per wall to avoid visual clutter. The mistake I used to make was highlighting everything equally — it diluted the impact of the lights.
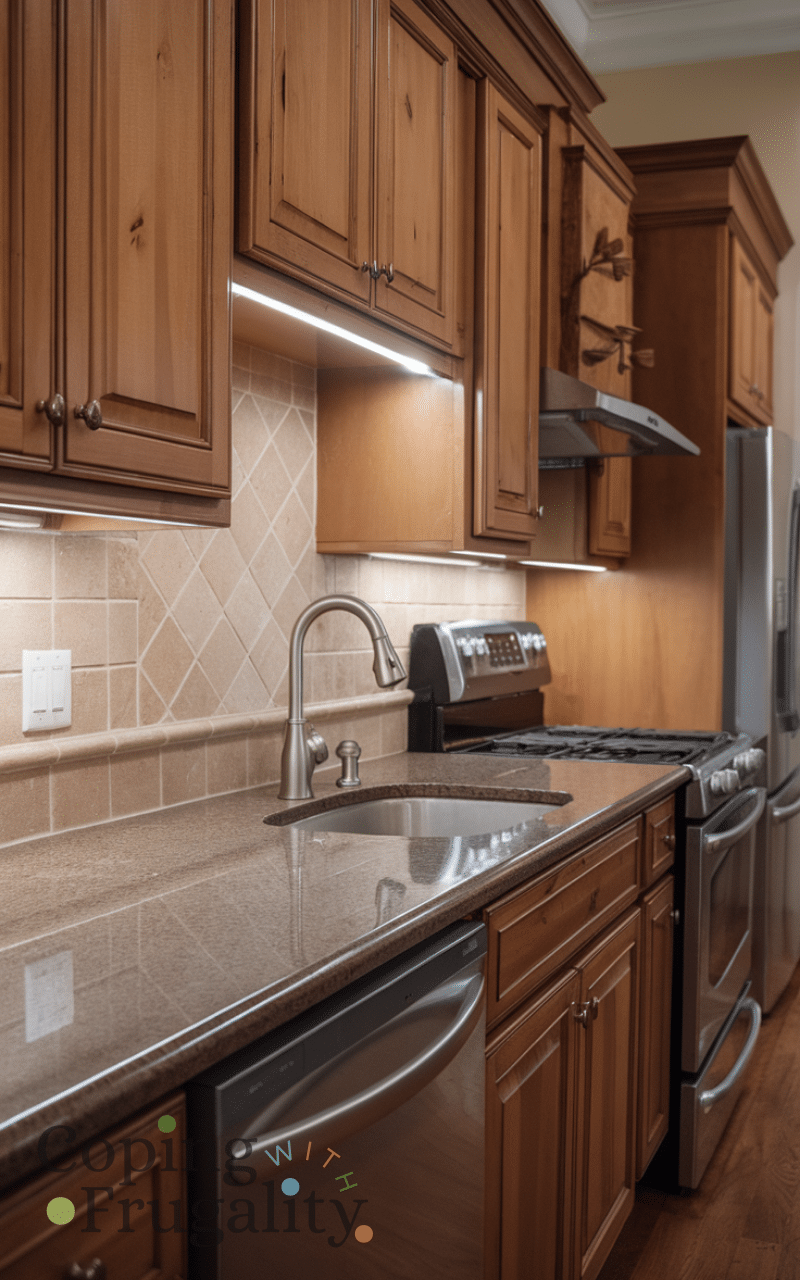
10. Incorporate Under-Cabinet Lighting
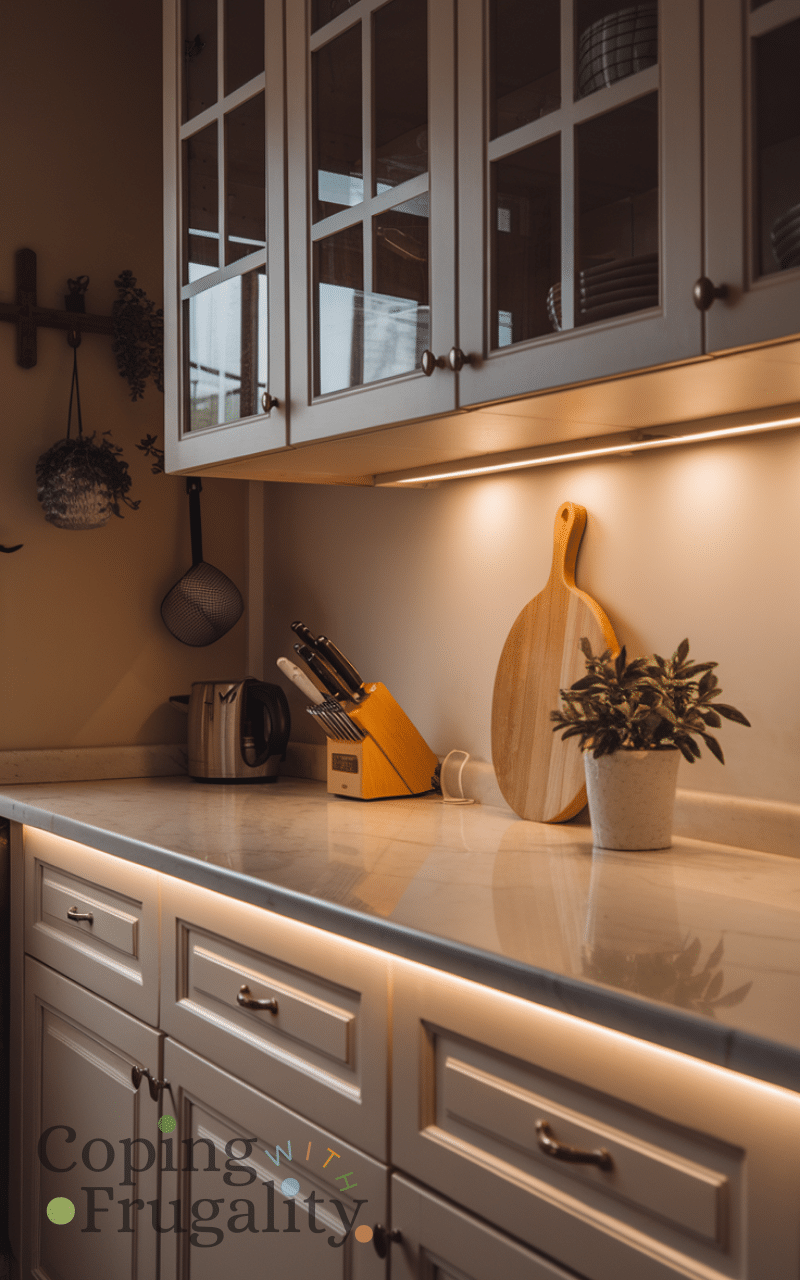
In kitchens, under-cabinet lighting is a practical and budget-friendly way to add layered illumination. It brightens countertops for cooking and creates soft ambient light when overhead lights are too harsh. LED strips or puck lights are inexpensive and easy to install, offering both functional and decorative benefits in your layered lighting plan.
Under-cabinet lights in my kitchen were transformative for about $20–$60. They provide task lighting without overhead glare and make cooking feel less harsh. I buy stick-on or plug-in LED strips instead of wired versions to save installation costs. My advice? Match bulb temperature to your other lights for cohesive warmth. People often forget to test placement before sticking lights permanently, which leads to awkward shadows.
9. Mix Warm and Cool Bulbs
Combining warm and cool-toned bulbs adds depth and dimension to rooms. Warm bulbs create cozy areas, while cool bulbs enhance visibility and energy. Strategically mixing them allows your layered lighting to feel dynamic and inviting. Using budget-friendly bulbs in different fixtures is an easy, inexpensive way to achieve a sophisticated layered look throughout your home.
I used to use whatever bulbs were on sale, but mixing warm and cool strategically changed everything. Budget-friendly bulbs are $5–$15 each, and it’s easy to adjust temperatures in different areas. I recommend keeping main spaces warm and task areas slightly cooler to balance comfort and function. A common mistake is mixing tones haphazardly — it can make rooms feel visually chaotic instead of layered.
8. Use Reflective Surfaces
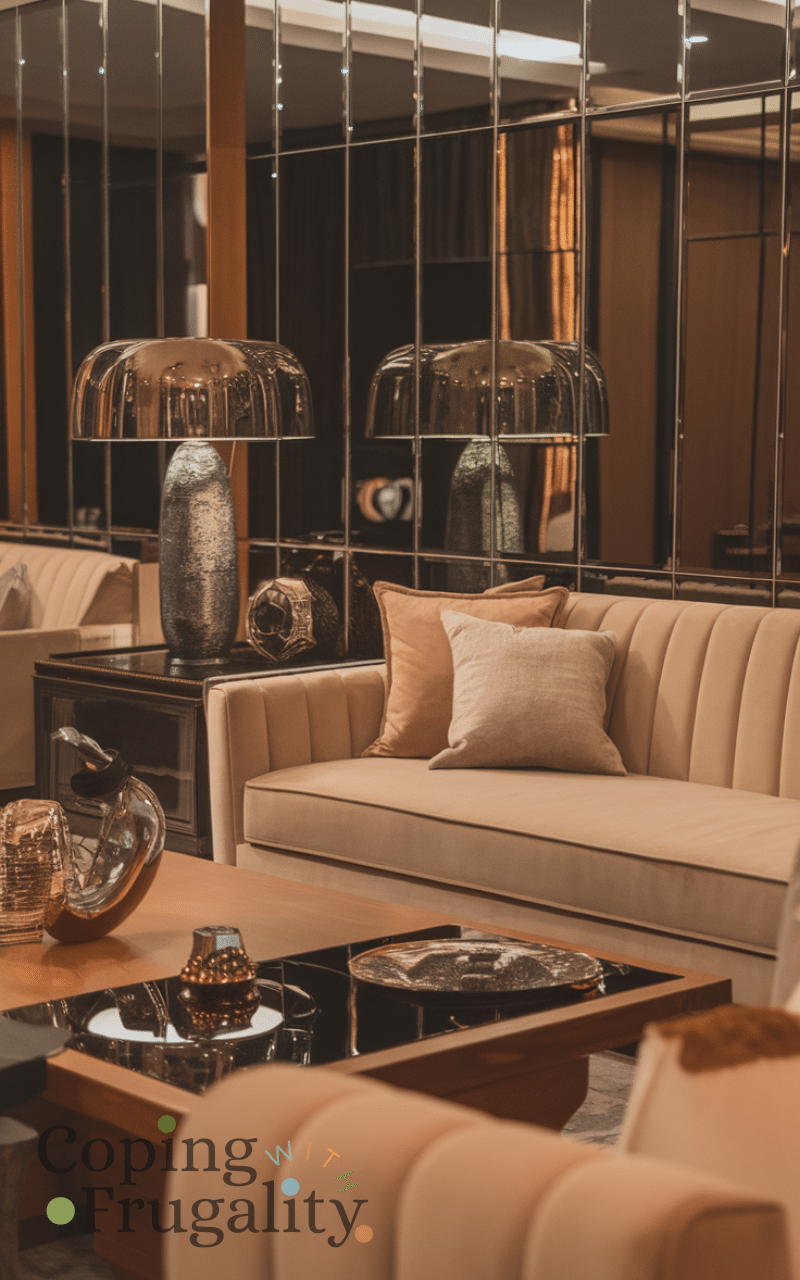
Mirrors, metallic accents, and glossy surfaces can amplify your layered lighting without extra lamps. Placing lights near reflective surfaces bounces illumination across the room, enhancing both brightness and depth. This trick is a cost-effective way to maximize the effect of layered lighting, making small spaces feel bigger and more radiant on a budget.
Mirrors and metallic accents are my secret weapon for layering light without extra lamps. I’ve found thrifted mirrors for $20–$100, which double the effect of any lamp. My recommendation is to place mirrors opposite a light source for maximum reflection. Many people make the mistake of using mirrors to hide clutter — it only amplifies the mess instead of light.
7. Add String Lights for Ambiance
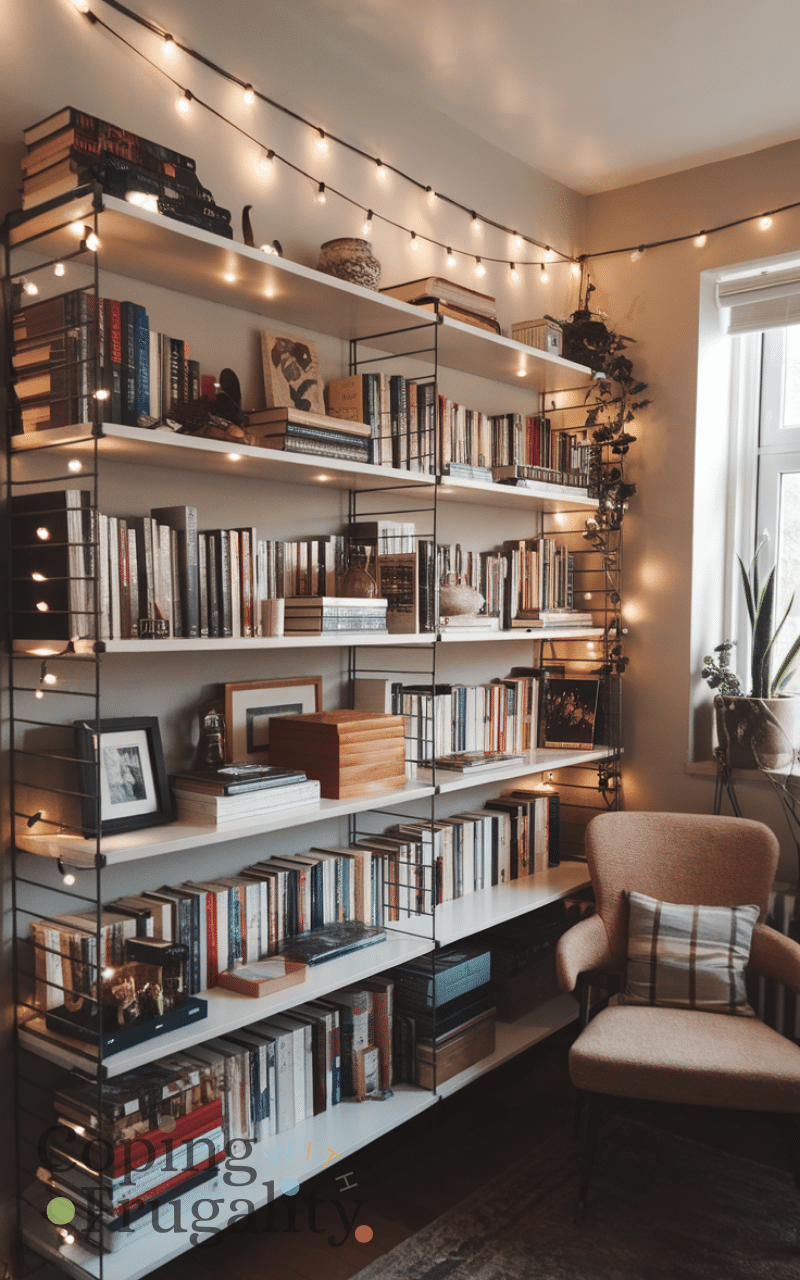
String lights aren’t just for holidays—they add charm and subtle accent lighting to any space. Draped along walls, shelves, or ceilings, they create a whimsical layer that complements main lighting. Affordable and easy to install, string lights are a fun and creative way to enhance layered lighting in your home while staying within budget.
String lights feel magical, and I’ve spent $15–$40 for a few strands that completely soften my space. Draping them around shelves or headboards adds charm instantly. My tip is to choose warm white and tuck cords neatly for a clean look. A common mistake is overdoing it — too many strands can look chaotic rather than cozy.
6. Combine Natural and Artificial Lighting
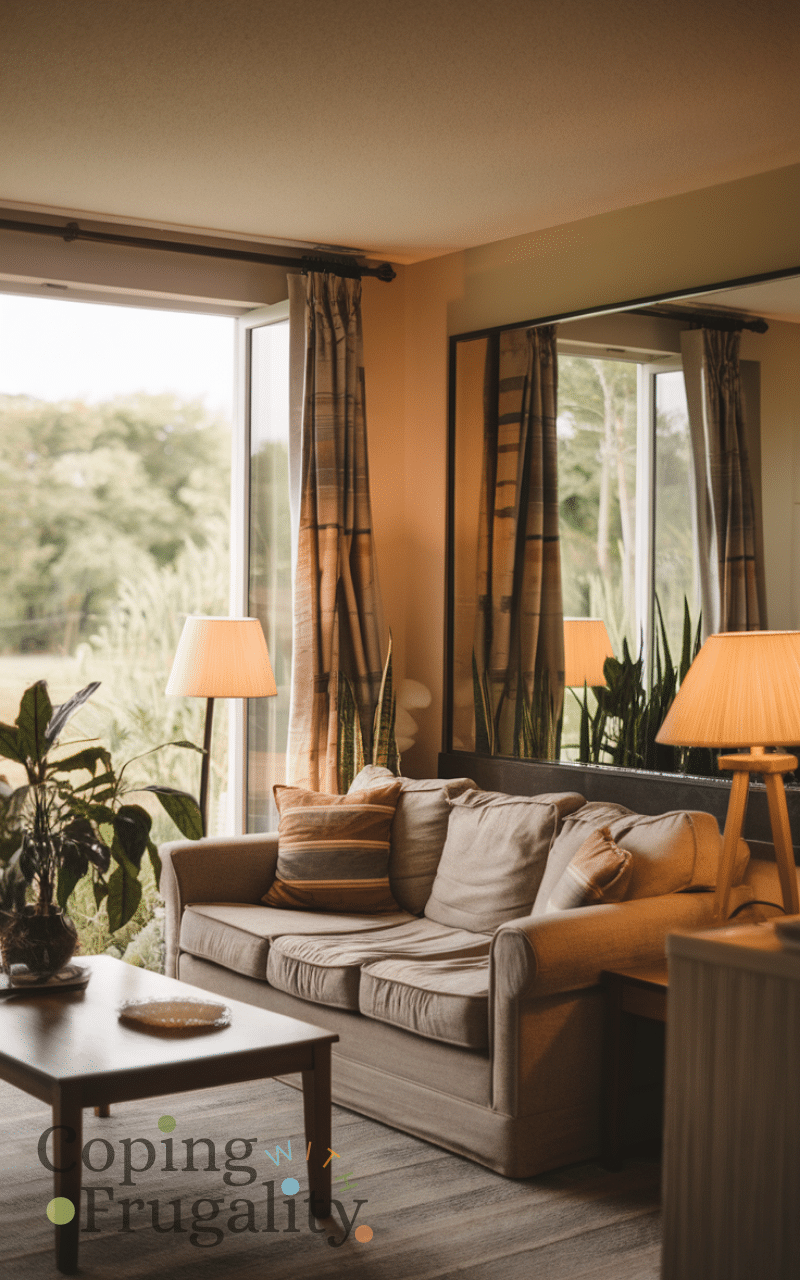
Use natural light during the day and layer artificial lights for evening ambiance. Open curtains, position mirrors, and place lamps strategically to balance brightness. This mix helps create depth and reduces shadows, giving your home a bright, airy feel. It’s a free and budget-friendly way to enhance layered lighting and improve the overall mood of your space.
I’ve learned to embrace daylight and layer artificial lights as the evening falls. It costs nothing extra, but strategically opening curtains and placing lamps makes the home feel airy and balanced. Mirrors amplify this effect without spending a dime. My recommendation? Observe how sunlight shifts through your room before placing lights. People often forget to adjust blinds or curtains, which can create harsh shadows and flatten a space.
5. Use Battery-Powered LED Lights
Battery-powered LEDs are inexpensive, flexible, and easy to place anywhere. They work well for adding small accent lights, under shelves, or in closets without rewiring. These LEDs allow you to experiment with layered lighting affordably, giving your home pockets of brightness and enhancing atmosphere without breaking the bank.
Battery-powered LEDs are small, cheap, and flexible — around $10–$25 each — perfect for temporary accent lighting. I love using them in corners or shelves where cords would be awkward. My tip is to use rechargeable batteries for long-term savings. Many people mistakenly overlook these lights, but they’re perfect for experimenting without permanent installation.
4. Create Zones with Lighting
Designate different areas in a room with specific lighting for tasks, relaxation, or display. A layered lighting setup with clearly defined zones makes your home feel larger, more organized, and inviting. You can achieve this affordably with a mix of lamps, pendants, and accent lights strategically placed throughout your space.
Designating lighting zones makes my rooms feel much more intentional. Using lamps, pendants, or strips in different areas costs $30–$150, depending on your setup. I recommend thinking about how you actually use each space instead of lighting blindly. A common mistake is lighting a room evenly; zoning adds depth and function, making the space feel professionally designed.
3. DIY Lampshades and Fixtures
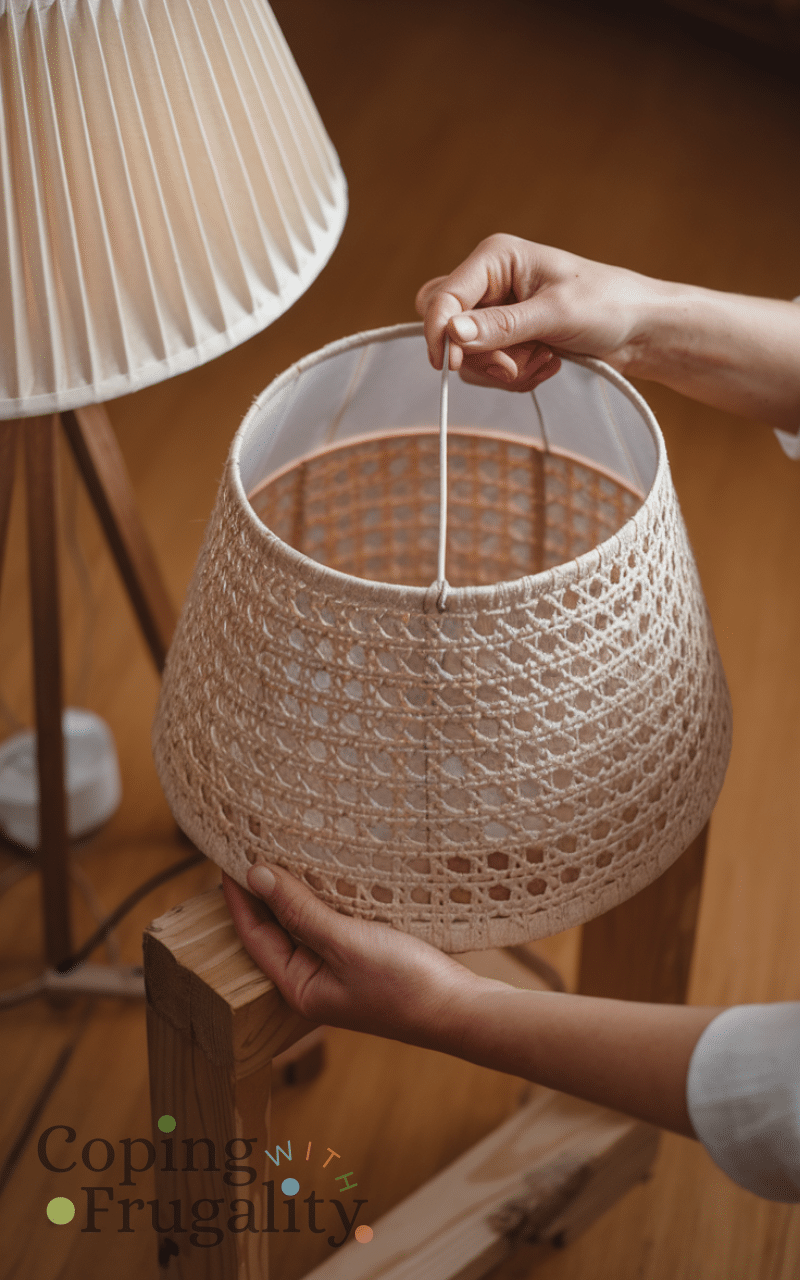
Customizing lampshades or creating your own fixtures is a fun, low-cost way to enhance layered lighting. Use recycled materials, fabric, or even paper to make unique shades that soften light and add personality. DIY solutions make layered lighting accessible on a budget while giving your home a creative and cozy vibe.
I love giving old lamps a new personality. For $5–$30, I can update shades with fabric or paper, softening light and adding style. My tip? Stick to lighter materials so bulbs don’t overheat. I personally think DIY projects make a home feel unique and lived-in. The mistake is choosing dark, heavy fabrics that block too much light and defeat the purpose.
2. Use Adjustable or Flexible Lights
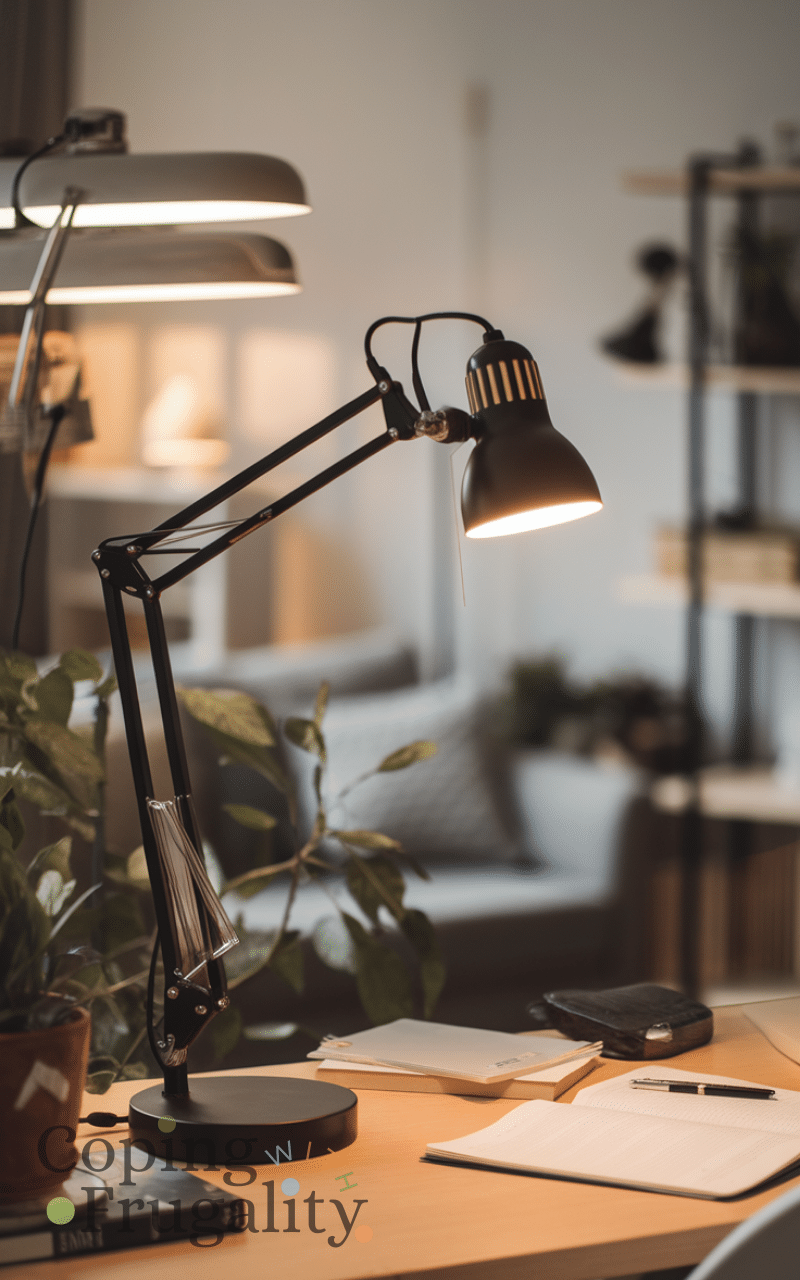
Lights with adjustable arms or flexible heads allow you to direct illumination where needed. Desk lamps, floor lamps, or wall-mounted options make it easy to create multiple layers of light without buying extra fixtures. Affordable and practical, these adjustable lights enhance functionality while contributing to a layered lighting design that suits every activity.
Flexible-arm lamps are lifesavers for reading, crafts, or accenting décor. I usually pay $20–$60 and can direct light exactly where it’s needed. My recommendation is to combine them with fixed lights to create a dynamic layered effect. People often assume adjustable lamps are just for desks, but they work beautifully throughout the home for layering light efficiently.
1. Embrace Accent Candles
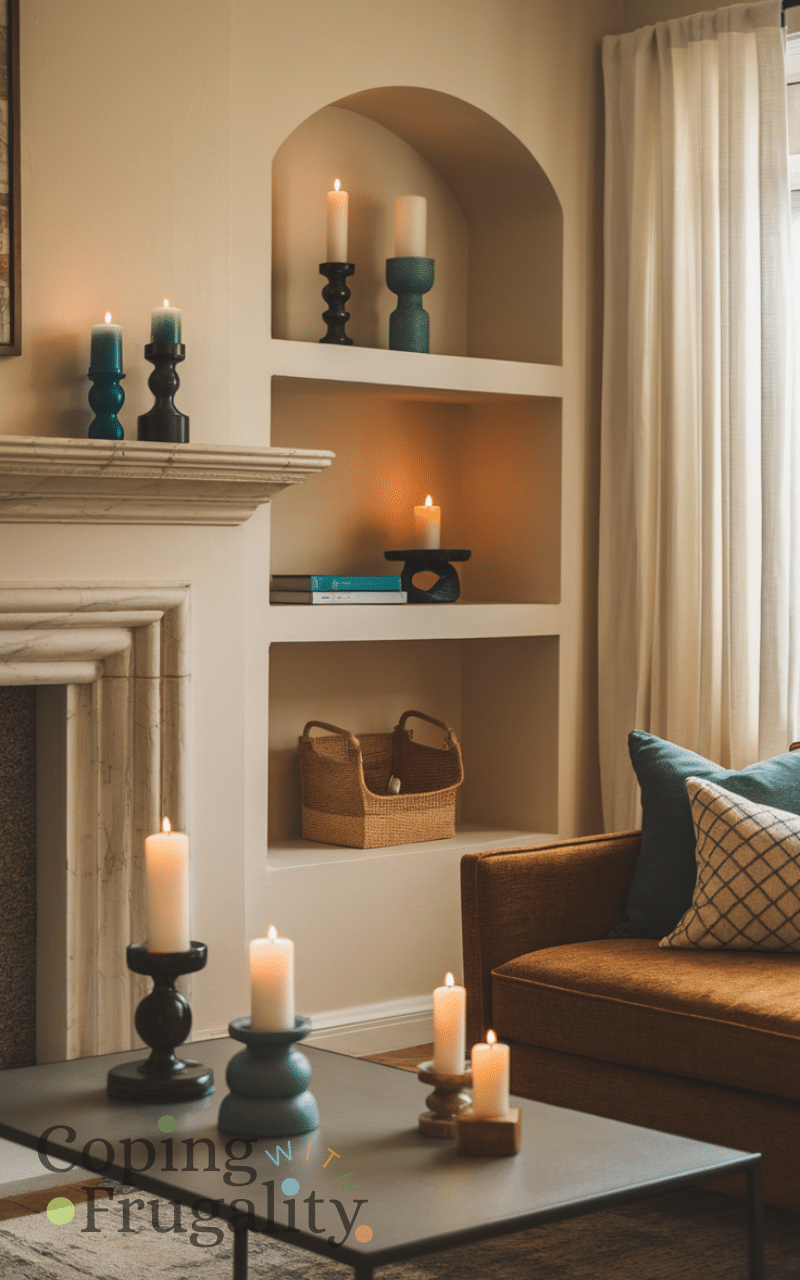
Candles are a budget-friendly and charming addition to layered lighting. Use them in clusters or holders on shelves, tables, or mantels to add soft, flickering ambiance. While inexpensive, they create depth, warmth, and a cozy atmosphere that complements other lighting layers, making your home feel inviting, stylish, and well-lit on a budget.
Candles are cheap but transformative — I spend around $10–$50 to cluster them in cozy spots. I love using thrifted holders and mixing pillar candles with tea lights for variety. My tip is to place them near other lights to create depth rather than in isolation. The common mistake? Using too few or placing them randomly, which looks unintentional instead of cozy.
Conclusion
Layered lighting can transform your home without spending a fortune. From combining ceiling lights and wall sconces to adding DIY accents and candles, these budget-friendly ideas bring depth, warmth, and style to every room. Start layering your lights today to create a more inviting, functional, and beautiful home. Don’t forget to subscribe to our blog for more practical tips and inspiring ideas to light up your home on a budget!